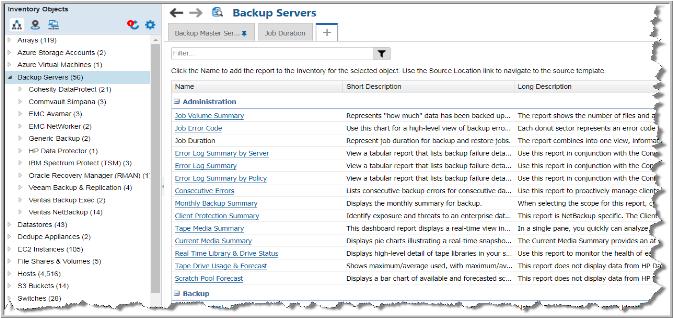
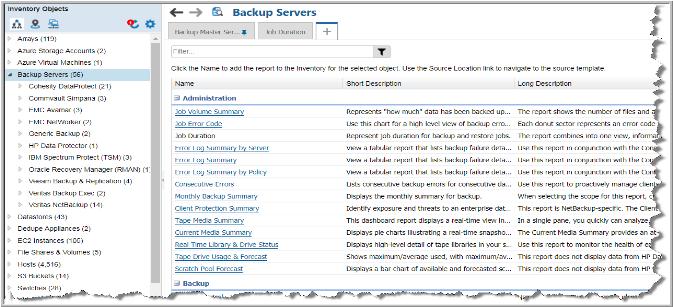
Working with the Inventory Reports View
Each inventory object category is associated with a default set of reports.
Note: Only a subset of the full APTARE report catalog is represented in the Inventory.
Groups with more than one object type do not have reports. For example, if you have sorted your Inventory by location, the object types could be different.
You can select what reports you want to readily access, by customizing and pinning an Inventory object’s set of base pages. These reports offer relevant data for the selected category and are displayed as tabs across the top of the Inventory view. They are sorted into information categories such as performance, storage or forecasting. The report list is controlled by privileges and license restrictions. As you navigate within the Inventory, the system remembers your 10 most recently visited locations and displays them in the navigation panel.
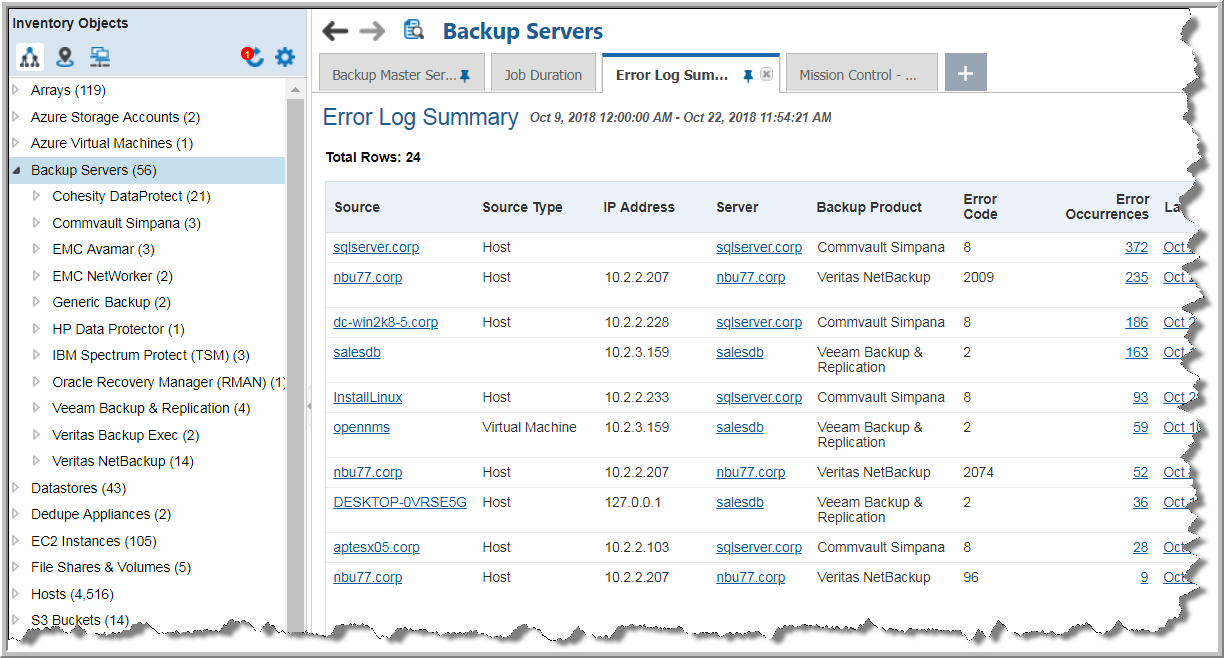
A summary page, when available, is displayed by default for each object and category.
The
Inventory Reports view enables you to:.
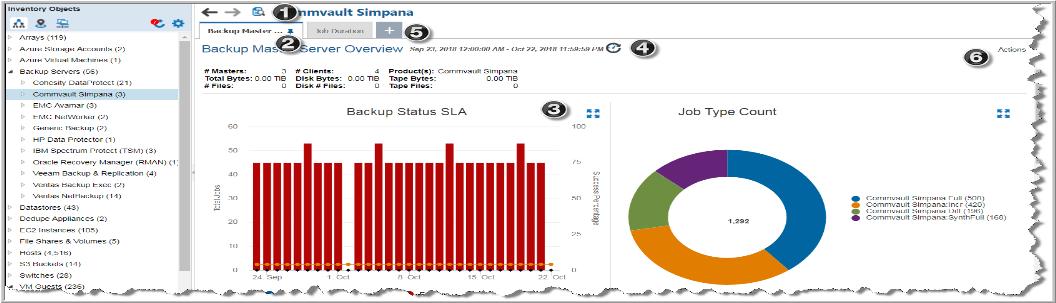
3. Expand the portlet outside of the dashboard for a full screen view of an individual chart.
5. View the list of available reports for this object type and choose each new report to display in tabs. See
Choosing Reports to Display.
See also:
Accessing Inventory Reports
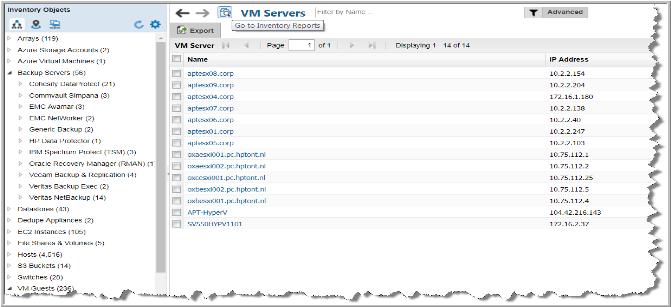
1. Click Inventory.
2. Select an object category or navigate to a single object in the Hierarchy Panel.
3. Click Go to Inventory Reports to toggle from the list of inventory objects within the category. An interactive summary page, when available, is displayed by default for each object or category.
Choosing Reports to Display
You can choose the reports to display with an Inventory object. Once selected, your choices are displayed as tabs in the Inventory Reports view. Reports displayed under Available Reports by Category are controlled by privileges and license restrictions. See also:
Only a subset of the full APTARE report catalog is represented in the Inventory. A curated set of report templates are displayed and organized by a high-level category. When displayed in the Inventory, these templates are sorted into information categories such as performance, storage or forecasting.
Displayed reports are either tied to the object selection by subsystem or the report is generic in nature. The report list is controlled by privileges and license restrictions.
Custom reports built using the Dynamic Template Designer and the SQL Template Designer are also displayed.
Report templates built for arrays, hosts, backup servers, datastores, VM guests and VM servers using the Dynamic Template Designer or SQL Template Designer can be assigned an Inventory report category during the creation process. See
Quick Start Step 1: Create a Basic Table Dynamic Template and
Inventory Report Configuration. Object type and subsystem can also be defined for further classification.
If a category has not been assigned, these templates are displayed under the heading
Uncategorized. You can always assign a category, by customizing an existing template. See
Customize and Export Dynamic Templates and
Edit a Custom Report Template.
Your selections are displayed as functional categories in the Inventory Reports view.
To select the reports to display for an Inventory object
You can select any report to render, but you must explicitly Pin the report to save it once you log out of the session.
1. Click Inventory.
2. Select an object in the Hierarchy Panel.
3. Switch the view to the
Inventory Reports, if required, by clicking the icon beside the object name.
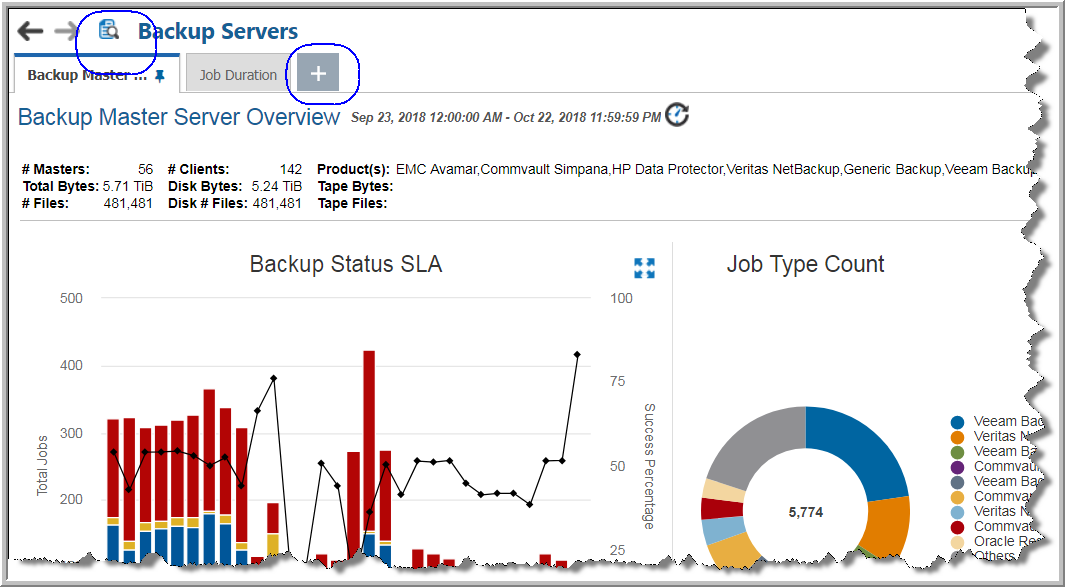
4. Click the + tab to access a list of available reports to assign to the object.
5. Click the report name to select and display it in your
Inventory Reports. If the name is not displayed as a link, it has already been selected.
Filtering within Available Reports by Category
If you are looking for a specific report name or description within the list of Available Reports by Category, enter the value to refine the list. This search examines report names and descriptions. The list of reports is controlled by privileges and license restrictions.
7. Enter a value into the
Filter field.
8. Click the Filter icon. The Available Reports by Category list is filtered to display only the reports that contain the specified value.
Pinning Reports - Saving Reports with Inventory Objects
Once selected, Pin the report to save the association with the Inventory object. This action displays the selected reports as tabs in the Inventory Reports view each time you access the Inventory.
1. Click Inventory.
2. Select an object type in the Hierarchy Panel.
3. Switch the view to the
Inventory Reports, if required,
by clicking the icon beside the object name.
4. Click the + tab to access a list of available reports to assign to the object.
6. Click the Pin icon to save the report with the selected object. You can close a pinned report and it will continued to be pinned. When you login again, the pinned report will be displayed.
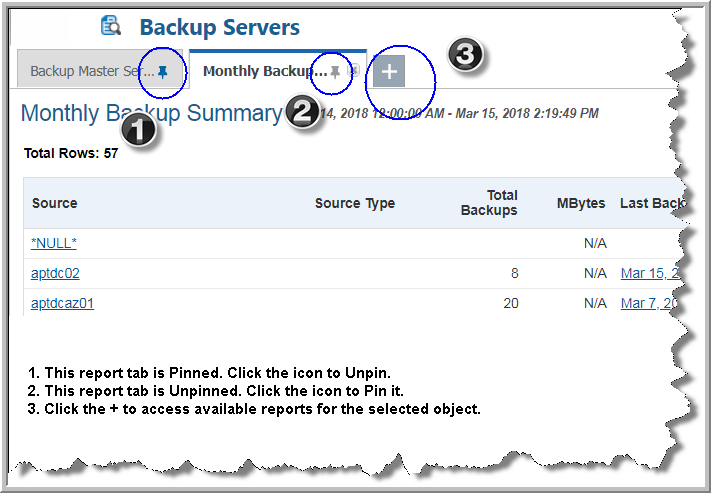
7. Click the Pin icon again to Unpin. One report must always be displayed, so if you try to unpin the last displayed report, an error message is displayed.
Renaming Pinned Tabs
Once you pin a report, by default, the tab displayed in the Inventory is labelled with the report name. You can rename the tab to display a name that is more meaningful to your business. You can also quickly reset it to the default report name. This change only applies to the tab and does not impact the actual report name.
Note: Unpinned tabs cannot be renamed.
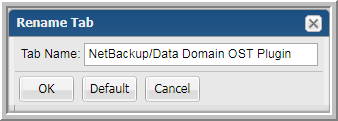
1. In the Inventory, right-click an active pinned tab.
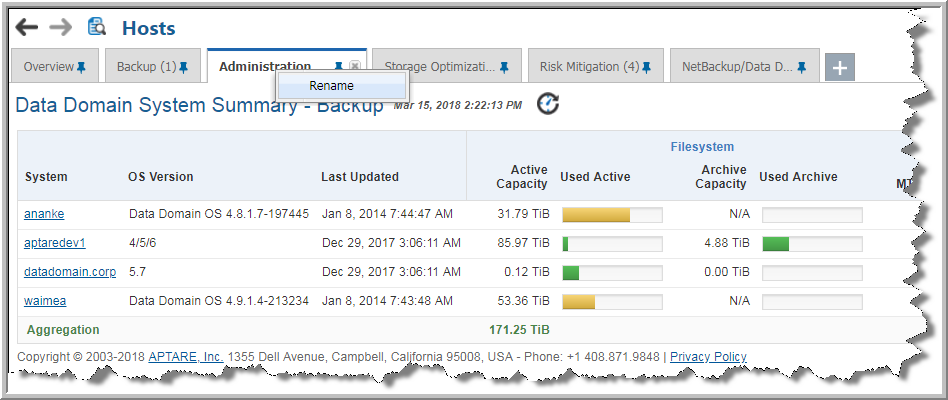
2. Select
Rename and enter the new name for the tab. The tab display name is updated.
Resetting Default Report Names on Pinned Tabs
1. In the Inventory, right-click an active pinned tab.
2. Select Rename.
3. Click Default. The tab display name is updated to the original report name.
Inventory Reports and the Action Menu
Many functions available to standard reports and templates are available to the reports in the Inventory Navigator.
• Inventory Reports: Edit Scope - Your selection in the Hierarchy Panel sets the objects which are part of the scope. For some objects and object groups, you can edit additional parameters.
Edit Scope is only shown when there are parameters available to change. A default time period is also set for those reports that require one. Use the Hierarchy Panel to revise the scope when the menu item is not displayed. See
Report Scope for details.
• Inventory Reports: Save As - When you save a report, you are saving a copy of the report into the
Reports tab,
not the report output. You can save a version in your Reports. Scope selections are saved with the report. See
Saving Reports for details.
Note: Some reports provided by the Inventory are specialized and not available from the Reports tab. Due to the nature of these reports, they function like Detail reports and cannot be customized or saved, as they are specific to the report from which they were derived. Save As is not displayed for these reports.
• Inventory Reports: Email - After you generate a report and it renders, you can choose to instantly email the report. Emailed reports are not derived from the cache. These events are run in real time, so current data is always used. You can email a report to yourself, other individuals, or a distribution list. Scheduling reports to be regularly emailed is not available from the
Inventory tab. See
Emailing Reports and Dashboards for details.
• Inventory Reports: Export - You can export reports to make them available to external applications, such as Microsoft Excel or if you’d like to generate a hardcopy, you can export them to a file, such as a PDF. Exported reports are not derived from the cache. These events are run in real-time, so current data is always used. See
Exporting Reports and Dashboards for details.
• Inventory Reports: Filter - In addition to the filtering that happens with your hierarchy selection, table-formatted reports can be further filtered on Rows and/or Columns, using advanced filtering. You can define the criteria for the data rows displayed in a report. Drop-down lists enable selections from the available columns. Next, you supply the operator—such as
equals or
does not contain—and a value for that column. Up to 16 selections can be joined to form the filter. See
Advanced Filtering for Tabular Reports for details.