Advanced SQL Report Template Options
Creating Drilldowns
Just as the out-of-the-box reports contain links that drill down to other reports, Custom Reports can be configured to include drilldowns.
Fields from the query can be used in the drill down syntax.
In the SQL Template Designer, in the Formatting window:
1. Select the field that will become the drill down link.
2. Click Advanced to launch the Drilldown window where you will enter the syntax required to drilldown to the report.
3. In the Drilldown window, enter the details that the Portal will need to link to the report. The following example and the accompanying descriptions illustrate the required components for a drilldown specification.
Examples
systemName=displayServerDetail&serverId=${row[‘server_id’].data}
templateInstanceId=400&serverId=${row['server_id']}
Where:
systemName | Drilldowns should start with a systemName or templateName parameter and then provide additional optional parameters to the target report. The fields from the query can be accessed using the ${} format to access the "row" context variable. e.g. ${row['field_name'].data} will substitute the field_name into the drilldown. System names for reports can be obtained by pressing CTRL+ALT+T while the report is in the active tab. Use either systemName, templateInstanceId, or templateName in the syntax, based on the following use cases. systemName - The required prefix for drilldowns to factory-shipped, out-of-the-box reports that cannot be customized with either the SQL Template Designer or the Dynamic Template Designer. templateInstanceId - The required prefix for drilldowns to Report Templates created with the Dynamic Template Designer. templateName - The required prefix for drilldowns to Report Templates created with the SQL Template Designer. |
<displayReportName>&<fieldName> | Insert the specific report systemName, templateInstanceId, or templateName along with the &<field Name> that is to be supplied by the parent report. To identify the system name or ID of an existing report, generate that report and in the active browser window type:
CTRL+ALT+T Two types of names are displayed: • System Name (systemName): For factory-shipped reports that cannot be customized, use this name for the displayReportName. • Dynamic Template ID (templateInstanceId): For Report Templates created with the Dynamic Template Designer, use this number in place of displayReportName. Note that for a Report Template that was create with the SQL Template Designer, CTRL+ALT+T does not display the templateName. A Template Name must be configured, as described in Using SQL Templates for Drilldowns. |
=${row[‘<field_name>’]}.data | The syntax required for the field name specification. |
4. Click OK in the drill down window.
Using SQL Templates for Drilldowns
Report Templates that have been created with the SQL Template Designer can be configured to be the target of a drill down. In this example, a Report Template is created with the SQL Template Designer to serve as the parent report. Another Report Template is then created with the SQL Template Designer to be the drill down details.
1. Using the SQL Template Designer, create a parent report that includes a query that lists a group of hosts, using the apt_v_server published view (example query: select * from apt_v_server). For the purpose of this example, we’ll call this the Parent Report.
2. Using the SQL Template Designer, create a second report that will be the Drilldown Report. For the purpose of a simplified example, you can use the same query that you used for the Parent Report.
3. Customize the Drilldown Report and before saving it, click Advanced at the top right of the SQL Template Designer window, as shown below.
4. In the Advanced window, enter a template name, for this example: Drilldown_Report, that will be used to configure the drill down in the Parent Report:
5. Customize the
Parent Report and in the Formatting tab, select the hostname field and click the
Advanced button at the bottom of the SQL Template Designer window. See also,
Advanced SQL Report Template Options.
• Enter the following syntax in the Drilldown field and click OK before saving the template: templateName=Drilldown_Report&hostname=${row['hostname']}.data
Creating Mouse-over Hovers
Custom Bar Charts, created with the SQL Template Designer, can be configured to have a mouse-over on the bars to display the charted values.
1. From the Portal Menu Bar, select Tools > Templates > SQL Template Designer to configure the mouse-over option.
2. Click the Formatting tab in the SQL Template Designer window.
3. Select the field that will become the displayed as a bar in the chart.
4. Click Advanced to launch the Drilldown and Hover window where you will enter the syntax required for the mouse-over option.
5. In the Hover input box, enter the syntax for the value.
The fields from the query can be accessed using the ${} format to access the row context variable.
EXAMPLE
${row['field_name'].data} will supply the field_name value for the mouse-over.
Adding an External Reference
Using the SQL Template Designer, you can create an tabular report template with a frame that can be populated from another URL providing HTML5 content. This special report template can then be placed on a dashboard and used in conjunction with other IT Analytics reports. See also,
Creating New Dashboards and Adding Reports.
Note: Not all sites will display. If the site included in the iframe returns the X-Frame-Options header, the linked site may not allow its inclusion in the iframe.
To create an external reference
1. Navigate to Tools>Designers>SQL Template Designer.
2. Click the
Query tab. No action is required on the
Template Designer tab.
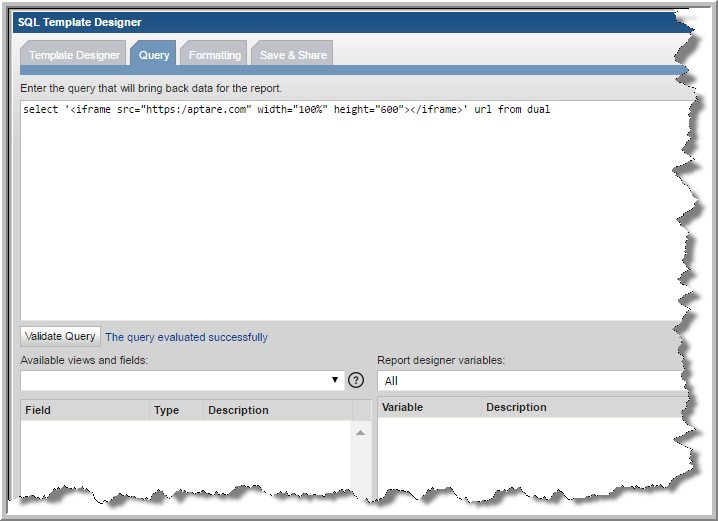
3. Enter the following select statement:
select '<iframe src="https:/aptare.com" width="100%" height="600"></iframe>' url from dual
4. Replace "https:/aptare.com" with the destination URL.
5. Click Validate Query.
6. Click the
Formatting tab. This page is pre-populated with the required field.

7. Verify the report is set to display as a Table.
8. Click the Save & Share tab.
9. Enter a name for the template and select the folder to save it in. The template name must be unique.
10. Optionally, enter a description.
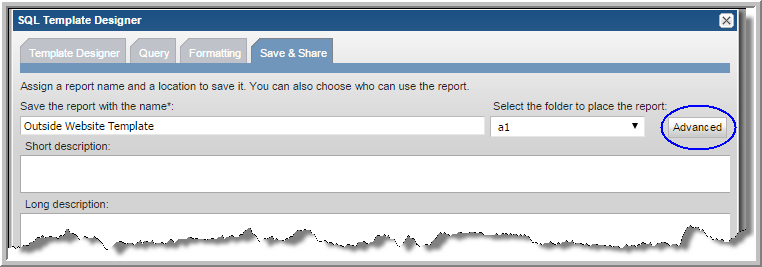
11. Click
Advanced.
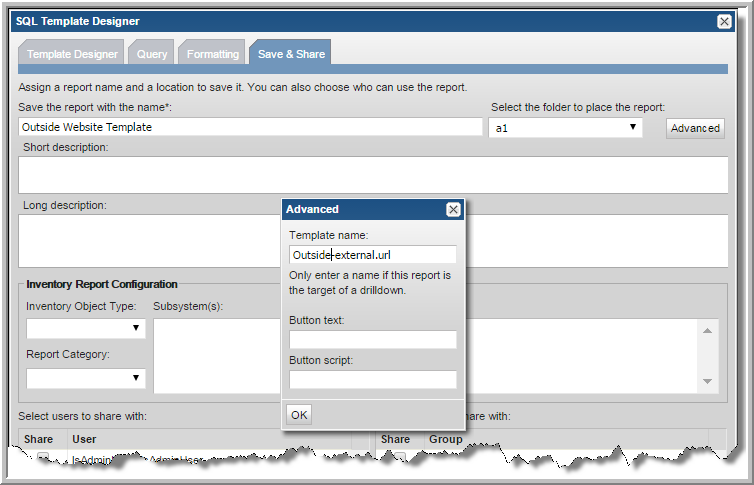
12. Enter xxx-external.url in the Template name field.
13. Replace xxx with a name.
14. Click OK.
15. Click Finish when back on the Save & Share tab.
16. Locate the report template in your specified folder and run it. You can add this to a dashboard.
Inventory Report Configuration
Assign the classification for report templates to display in the Inventory. This optional setting, can be assigned to report templates for arrays, hosts and backup servers. Assign an Inventory report category, object type and subsystem.
When displayed in the Inventory, templates are sorted by object type (Array, Backup Server or Host) and information categories such as performance, storage or forecasting. For templates created using the SQL Template Designer, you can assign values for these as you create the template or you can customize an existing one.
If a category has not been selected, these templates are displayed under the heading Uncategorized.
To assign the Inventory Report Configuration
1. Navigate to the Save & Share tab. You can either be creating a report template or editing one.
2. Select an
Inventory Object Type and associated
Subsystem vendor. You can also select
All.
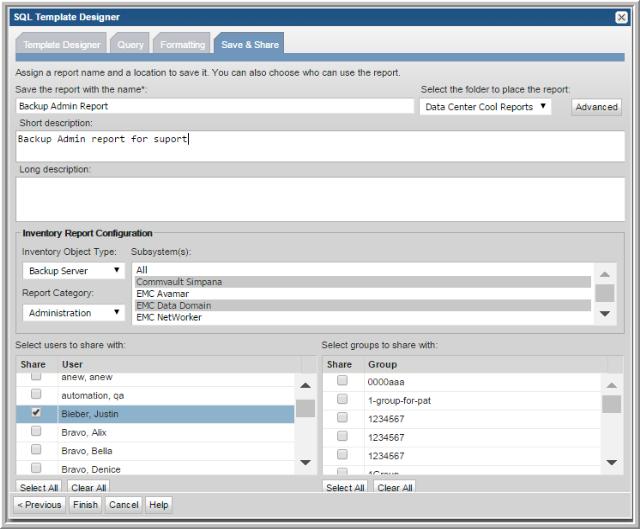
3. Select a Report Category. Choose from Administration, Backup, Billing, Capacity, Forecasting, Management, Overview, Performance, Risk Mitigation, or Storage Optimization.
About the Reports in the Inventory
• SQL Templates categorized for Hosts are displayed for all host groups and all individual hosts.
• SQL Templates categorized for Backup Servers and specific subsystems are displayed only for the groups of that subsystem and individual servers of that subsystem.
• SQL Templates categorized for Backup Servers and All subsystems are displayed for all groups of subsystems for Backup Servers and individual servers.
• SQL Templates categorized for Arrays are displayed for all array groups and all individual arrays.
• SQL Templates categorized for VM Guests are displayed for all VM Guest groups and all individual VM Guests.
• SQL Templates categorized for Datastores are displayed for all datastore groups and all individual datastores.
• SQL Templates categorized for VM Servers are displayed for all VM Server groups and all individual VM Servers.
Edit a Custom Report Template
Once you have saved a custom-designed report template, you can return to it to edit its configuration. For example, you can modify the SQL query or share it with additional users.
To edit a custom report template
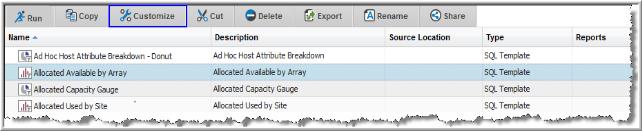
1. Select the report template in the Reports tab.
2. Click Customize on the action bar. The relevant Template Designer is displayed to edit the template.