Getting Started with the Inventory Navigator
Customize the view into your Inventory by grouping the inventory objects in a way that is the most relevant to your business. Once you’ve defined the view and the hierarchy structure, the Portal presents only the reports relevant to that structure. This allows you to see the reports and analyze the data faster and more efficiently.
View your inventory by the following organization structures:
• Object type and subsystem
• Location and object type
• Domain
• Cloud
• Custom attributes
• Host groups
You can also create ad hoc custom object lists for homogenous objects and see the relevant reports. See
Creating Custom Object Lists for details.
Further, the information is presented in two view options, a list view and a reports view.
The following figure highlights key terms and functional areas in the Inventory.
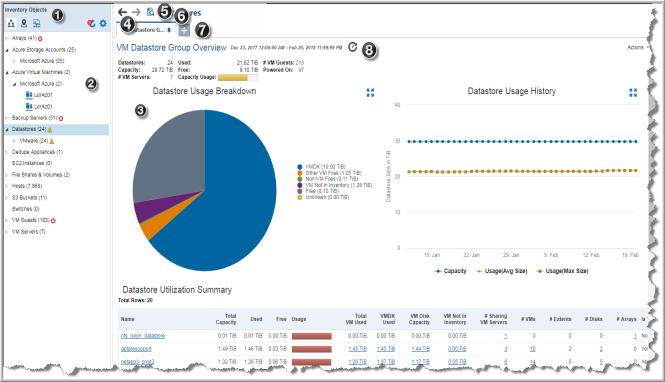
1. Hierarchy Toolbar - Use the toolbar to quickly organize and refresh the display of your inventory. The icons stay highlighted to indicate the view you selected. Select from:
a Object type and subsystem (default organization)
b Location and object type
d Refresh - When the icon displays a notification badge, rollover to identify what changes have been made in the Portal.
Note: You can also create ad hoc lists for like objects, for example a specific set of hosts, and view relevant reports for just that selection. These object lists are displayed in the
Hierarchy Panel. See
Creating Custom Object Lists.
2. Hierarchy Panel - Navigate through the inventory by expanding and collapsing categories. Select a category or an individual object to display relevant reports. If an attribute is used to group objects, this is easily identified in the panel. Clickable Alerts are also displayed in the hierarchy. See
Using Attributes to Organize Your Data and
Detecting Alerts in the Inventory.
4. Navigation Buttons - Navigate within a single session, to jump back and forward through your Inventory history. This is useful when trying to complete a root cause analysis and you need to jump between multiple objects/pages within the Inventory.
Note: Changing the hierarchy or logging out clears the Inventory history.
5. Toggle to Inventory List or Inventory Reports - Allows you to toggle between the Inventory List and the Inventory Reports for categories of objects. The previous graphic is displaying the Inventory Reports. The Inventory List displays all the collected inventory objects for a category and enables object management functions.
7. Select Reports - Click to view and choose each new report for the selected object in the
Hierarchy Panel. See
Choosing Reports to Display.
8. Data Age Indicator - When a report is served from the browser cache, an indicator icon is displayed on reports and dashboards. You can roll over the indicator to show the age of the report from the cache. Click the icon to purge the old report from the cache and rerun the report from the database.
When you run a report, the Portal takes the scope of the report, and checks if the cache contains the same report, for the same scope. If it does, the results are displayed from the cache. If the combination does
not exist, the report is run from the database, saved in the cache, and then sent to the user interface. Cached reports are shared across users who belong to the same home host group. See also
How Reports and Caching Work Together.
Using the Hierarchy Toolbar to Organize Your Data
Use the Hierarchy toolbar to organize the view of your collected inventory. You can customize the view using the provided default categories or create custom attributes to organize your data. Once set, these organizational categories will display only the reports relevant to your Inventory selection.
For example, if you choose to organize by Host Groups, once you select a group, your collected data center inventory is displayed and only the reports relevant to the selected Host Group are displayed.
The toolbar includes:
1. Default Hierarchy - Lists the inventory object type as the first-level category and vendor subsystem as the second. For example, Hosts is the top category and EMC Symmetrix would be the second-level category.
2. Location - Assigns a two-level selection for the location attribute, Location and Inventory Object Type. Working with this attribute, you can organize the view into your data center by location.
3. Host Groups - Organize your data by Host Groups. Host groups can be nested within other host groups, thereby organizing hosts into sub-groups. In addition, a host can appear in multiple host groups so that it can be included in reports for the different groups. Refer to
Managing Hosts, Backup Servers and Host Groups for complete information about Host Groups and their usage.
4. Refresh - When additions or deletions occur in the Inventory, the Hierarchy Panel does not automatically reflect the update. These can be changes made by you or someone in your host group. The Refresh icon displays a numeric badge to indicate changes have been detected. You can roll your cursor over the badge to see what’s changed.
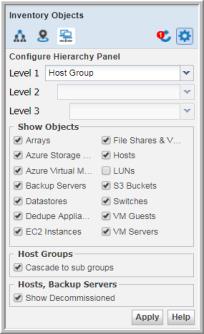
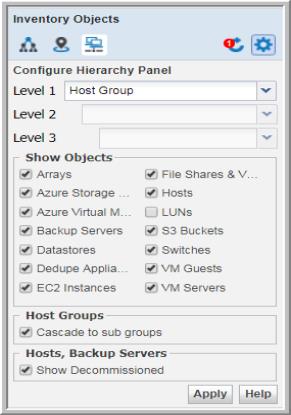
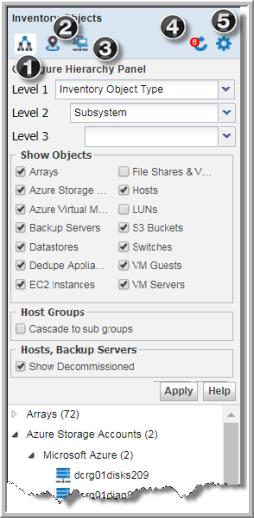
5. Configure - Set the hierarchy manually using any of the defaults or create a custom organization with your own multi-level organization. You can define up to three levels using the Hierarchy Panel.
Predefined organization settings include, object type and subsystem vendor, location and object type, domains, cloud, and host groups. Configure also allows you to set the object display in the Inventory. Settings enable you to pick and choose which objects to show in the Inventory. You can also choose to hide decommissioned hosts.
Attribute Value Limitations
If an attribute has more than 400 values, and is assigned to an object, they are displayed as one value and labelled Aggregated for <n> values. This is applicable for:
• The Host Overview report
• A value displayed in a grid column for the attribute
• The Inventory Hierarchy will show as a single group with the label as the count value
Best practice is to limit attribute values to 50 total. Contact Veritas Support for additional information.
Selection Combinations
Note: Not all selection combinations are valid. Invalid combinations may result in duplicate folder names. For example, using VMware, if you remove the top-level Inventory Object Type from the hierarchy selections, duplication can occur as follows:
VMware
Guest1
Guest2
VMware
ESX1
ESX2
Inventory Object Limits
The Inventory is designed to manage large-scale environments and has been evaluated to support up to a minimum of 250,000 objects. Your browser vendor/version may actually support more objects without an impact to performance.
If your browser cannot accommodate the volume, you can reduce the total number of items displayed in the
Inventory. See
Show Objects for details about how to enable and disable object display.
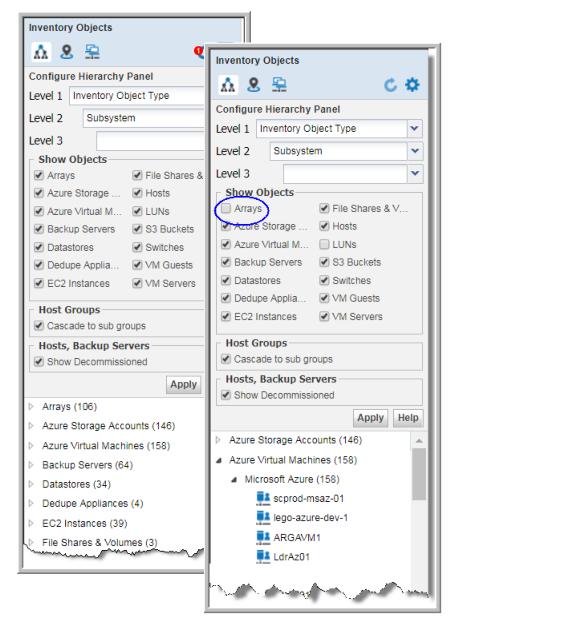
Show Objects
Use
Show Objects to control the display of items in the
Hierarchy Panel. If your browser limitations, (browser type, version and available memory) cannot accommodate the volume in your data center, you can reduce the total number of items displayed in the
Inventory by de-selecting objects. You must select at least one object. Objects are controlled by privileges - meaning, for an object to be shown as a selection, you must have the privilege for that object. A user is assigned access to individual object types. Administrators can also define which objects are selected by default. See
About User Privileges and
Configuring Global Default Inventory Object Selection.
Note: LUNs are de-selected by default for most user roles. This is to address possible performance issues as related to the volume of LUN data. You can always select LUNs and click Refresh to display the objects in the Inventory.
Backup Servers in the Inventory
Backup Servers displayed in the Inventory are based on:
• The associated Host Type
• If at any point in time, jobs were collected against the server, even if the host type has been changed.
Cloud-based objects are displayed under Show Objects regardless of installed products. If you do not collect data from these objects, your Inventory hierarchy will display them with a count value of zero. Cloud-based objects include:
• Amazon EC2 Instances
• Amazon S3 Buckets
• Microsoft Azure Storage Accounts
• Microsoft Azure Virtual Machines
Note: You can also choose to hide decommissioned Hosts and Backup Servers. This is a selection in the Hierarchy Panel along with Object Types.
Count Values
Groups with a zero (0) value on their display may be because:
• Data has not been collected. You must install data collectors and set up collection policies.
• Host object types may not be directly assigned to the host group. When you select Cascade to sub-groups, the top-level host group count reflects the count of its immediate members (all hosts and backup servers assigned to the group) plus the members of its child host groups. The counts are rolled up to the top level host group. When Cascade to sub groups is not selected, the count for each group only reflects hosts/backup servers directly assigned to it.
Resetting Inventory Defaults
Default object selection may be set by your Administrator. You can always select any displayed objects. In some cases, environments with large volumes of data may be impacted by browser limitations and all object selections may not display in the Inventory. You can reset the Inventory to the default selections to work around issues with the browser.
To Reset Inventory Defaults
1. Click the User Account menu.
2. Select
Reset Inventory Defaults.
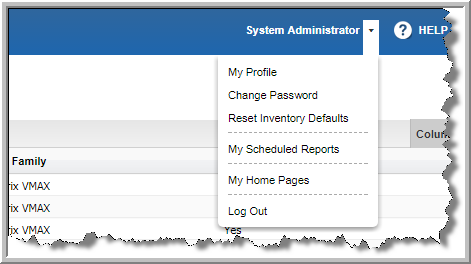
3. Log in again to view the new selections.
Host Groups
Host Group structures are one of the default organizational structures for the Inventory. Choose this setting to view your inventory by Host Groups you’ve setup. Only the reports relevant to the selected Host Group are displayed.
Select Cascade to sub groups to display host groups in an aggregated mode. This structure determines how host counts are reported.
When you select Cascade to sub groups, the top level host group count reflects all hosts and backup servers assigned to the group and all directly assigned to its sub groups. The counts are rolled up to the top level host group.
When Cascade to sub groups is not selected (non-aggregate mode), the count for each group only reflects hosts/backup servers directly assigned to it.
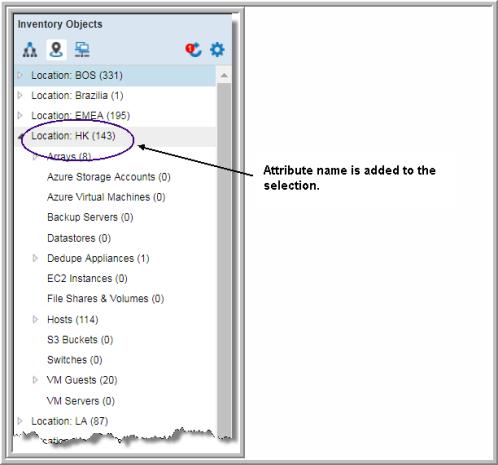
Using Attributes to Organize Your Data
You can use attributes to organize your inventory data. Once set up, these attributes are available for selection in the Hierarchy Panel. Attributes must have values associated with them before they can be used to organize your Inventory view. When viewing the Hierarchy Panel, the attribute name is prepended to the attribute value.
System Attributes
Predefined system attributes include:
• Application
• Business_Unit
• Data_Center
• Department
• Environment
• Location
• Organization
• Owner
• Region
Create custom attributes to further characterize an object with relevant properties. For example, you could create an attribute named Service_Required and set the attribute values as dates, and then assign it to your different Backup Servers. This would enable you to assign these properties to specific inventory types and organize the
Inventory View by Service_Required. See
Managing Attributes and
Host Groups vs Attributes.
Attribute Value Limitations
If an attribute has more than 400 values and is assigned to an object, they are displayed as one value and labelled Aggregated for <n> values. This is applicable for:
• The Host Overview report
• A value displayed in a grid column for the attribute
• The Inventory Hierarchy will show as a single group with the label as the count value
Best practice is to limit attribute values to 50 total. Contact Veritas Support for additional information.
To set up a custom hierarchy view
1. Click Inventory.
2. Click the Configure icon.
3. Select a top-level category from the Level 1 drop down. This is a required selection. For multi-tenancy environments, such as MSPs, the first selection could be Domain. You can select up to three custom levels, but are only required to choose one.
Not all selection combinations are valid. Invalid combinations may result in duplicate folder names or inaccessible folder structures. See
Selection Combinations.
4. Select the Inventory Objects you’d like to display. You can also choose to hide decommissioned hosts.
Note: Click the Default Hierarchy icon to return to the initial Inventory Object Type > Subsystem vendor hierarchy.
5. Click Apply when you complete all selections.
Using Host Groups to Organize Your Data
Organize your data center view by Host Groups. Host groups represent relationships between hosts such as a business unit or a department. Host groups can be nested within host groups, resulting in sub-groups. In addition, a host can appear in multiple host groups. Host Group view is available in two modes - aggregate or non-aggregate. This is set using the
Configure button. See
Using the Hierarchy Toolbar to Organize Your Data. This structure determines how host counts are reported.
See
Count Values for more information.
The Inventory also provides management functionality for Hosts, Backup Servers and Host Groups. See
Managing Hosts, Backup Servers and Host Groups and
Host Groups vs Attributes for details.
To access Host Groups view
1. Click Inventory.
2. Click the Host Groups icon.
3. Click the Configure icon.
4. Select Cascade to sub groups to display host groups in an aggregated mode.
This structure determines how host counts are reported. When you select Cascade to sub groups, the top-level host group count reflects all hosts assigned to the group and all hosts directly assigned to its sub groups. The counts are rolled up to the top-level host group. When Cascade to sub groups is not selected (non-aggregate mode), the count for each group only reflects hosts directly assigned to it.
5. Click Apply when you complete all selections.
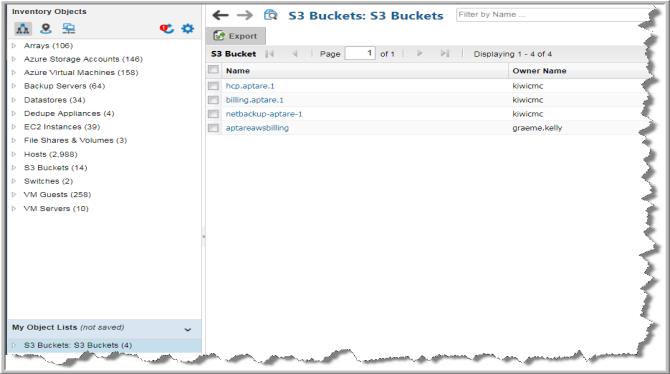
Creating Custom Object Lists
You can create ad hoc custom groupings for homogenous object types and see the reports relevant to that custom set. This temporary list is only available until:
• you log out
• your session expires
• your browser is refreshed
If you are looking for a more permanent grouping, use Saved Filters in the Inventory. See
Saving Advanced Filters (Inventory).
To set up a custom Object List
Note: Object types must be alike to create a custom group.
1. Navigate to the Inventory.
4. Select the objects you’d like to group.
5. Click
New List. The
Add New Object List dialog is displayed.
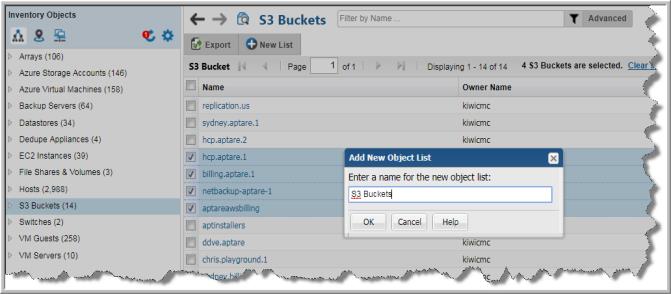
6. Enter a name and click OK.
The new group is displayed under the
My Object Lists section on the hierarchy panel.
If your object list is composed of hosts or backup servers, add individual ones to your list using the
Add button. When you add them, they are added to your
My Object List and to the host group you assign. See
Managing Hosts and Backup Servers.
7. Select the group and switch to Inventory reports to display the relevant reports.
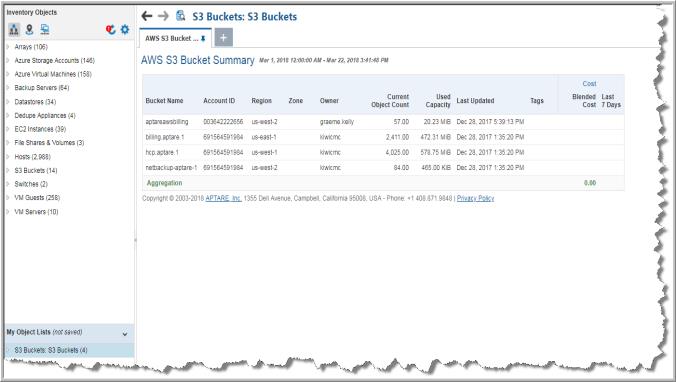
The displayed report set is determined by the base object. For example, if you have selected Backup Servers and for that object type, the Inventory displays Current Media Summary and Backup Executive Summary those same reports are presented. You also customized what reports are displayed. See
Choosing Reports to Display.