Assigning User Privileges
You can assign users many different privileges, such as enabling access to specific reports and authorizing administrative configuration features. In some cases, especially administration, access privileges are driven by corporate policies.
See also:
To assign privileges to an individual user
1. Select Admin > Users > Users and Privileges. The window displays all Portal users.
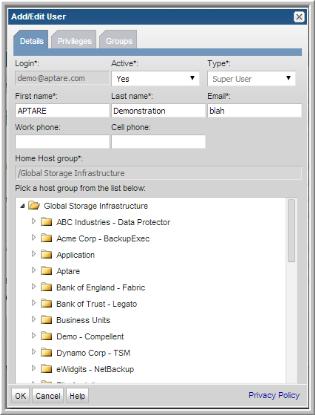
2. Double-click the user name to which you want to assign privileges. The Add/Edit User window displays the user’s profile.
3. Assign a Home host group by clicking a checkbox next to a host group. The home host group determines the level for which reporting data will be gathered. A user can access any data for that host group and its children.
4. Assign the user privileges:
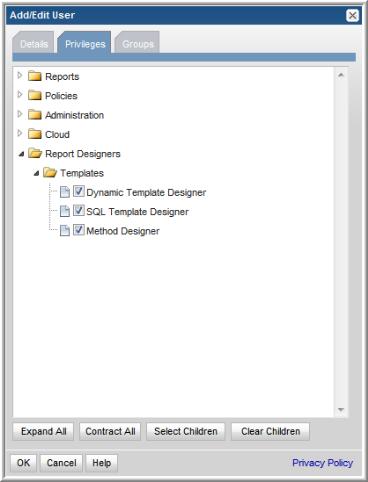
a Click the Privileges tab.
b Click the arrow beside the appropriate privilege folder to expand it. Or, click the
Expand All button at the bottom of the window. See
User Privileges.
c Individually select the check boxes that correspond to the required privileges or select all entries in a folder by following the procedure described in
Enabling All Privileges in a Category.
5. Click OK.
To assign privileges to a User Group
1. Select
Admin >
Users>
User Groups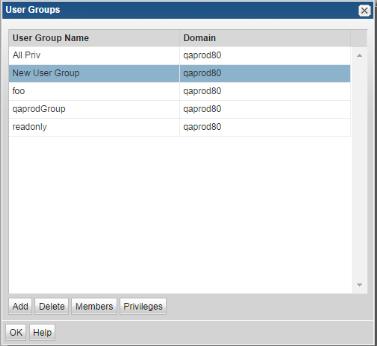
2. Select a User Group Name.
3. Click Privileges.
a Click the arrow beside the appropriate privilege folder to expand it. Or, click the
Expand All button at the bottom of the window. See
User Privileges.
b Individually select the check boxes that correspond to the required privileges or select all entries in a folder by following the procedure described in
Enabling All Privileges in a Category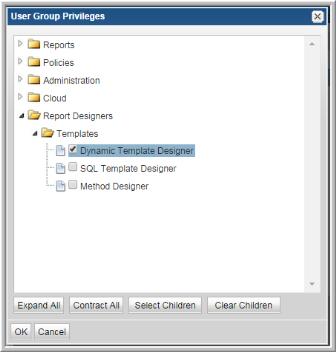
.
4. Click OK.
Enabling New Product Report Templates
When StorageConsole introduces new system report templates, existing user accounts need to be modified to gain access to the new templates. For Super Admin, notification badges are displayed in the Explorer. These badges quickly identify new and updated system report templates. Badges are automatically displayed on their product folder indicating when a template change has been introduced. This badge serves as a notification. The Super Admin must use privileges to enable each product report template for users or user groups.
When they are introduced, new system report templates, delivered automatically by APTARE, appear in the correct folders in the privileges section. All reports are displayed regardless of the products you have licensed and installed.
RECOMMENDATION: The User Group feature lends itself to quickly enabling access to report templates that become available.
To grant access to report templates
1. Select Admin > Users > Users and Privileges. The window displays all Portal users.
2. Double-click the user name to which you want to assign privileges. The Add/Edit User window displays the user’s profile.
3. Click the
Privileges tab and expand
Reports.
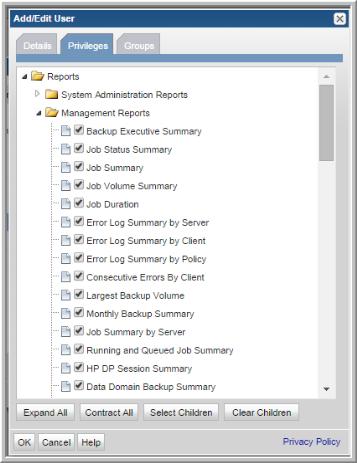
4. Click the reports to grant access. This can be done by individual user or by user group. User groups are the most efficient way to grant access to any report template, feature or enhancement.
Enabling Cloud Privileges
APTARE periodically publishes new user report templates and makes them available through the Cloud section in the Explorer. You must enable the privilege for users to see the Cloud section in the Explorer, view and have access to the report templates.
1. Select Admin > Users > Users and Privileges. The window displays all Portal users.
2. Double-click the user name to which you want to assign privileges. The Add/Edit User window displays the user’s profile.
3. Click the
Privileges tab and expand
Cloud.
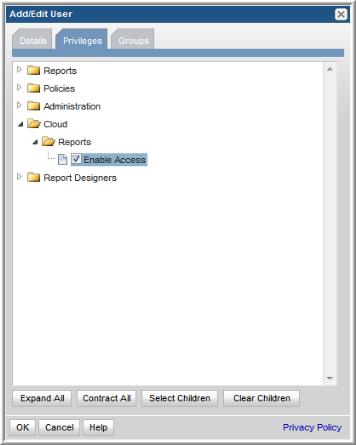
4. Select Enable Access.
5. Click OK.
Granting Access to Template Designers
Several tools give you the capability to create report templates to satisfy your organization’s reporting requirements.
• Dynamic Template Designer: A tool to create custom reports by dragging and dropping database components, which are then used to dynamically generate the Structured Query Language (SQL) query “behind the scenes” of the Portal. See
Working with the Dynamic Template Designer.
• SQL Template Designer: An interface to enable custom report creation using SQL skills.
• Method Designer: A tool to create a method, which enables special processing to be incorporated into a report template. A method can take parameters, perform an action, such as a complex calculation, and then return a value. This advanced feature requires experience in SQL query development. Methods can be used only in report templates that have been created using the Dynamic Template Designer.
1. Select Admin > Users > Users and Privileges. The window displays all Portal users.
2. Double-click the user name to which you want to assign privileges. The Add/Edit User window displays the user’s profile.
3. Click the Privileges tab, expand the Report Designers folder, check the designers to be enabled, and click OK.
Setting Administration Privileges
You can limit the administrative tools that are available to an individual user through the Portal. For example, you may want a specific user to be able to organize and manage host groups, but that same user should not be allowed to modify the attributes of individual hosts or to set up user access accounts.
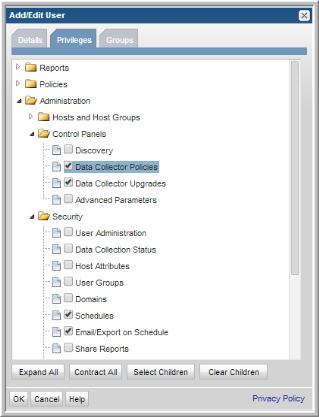
To configure administration privileges
1. Select Admin > Users > Users and Privileges. The window displays all Portal users.
2. Double-click the user name to which you want to assign privileges. The Add/Edit User window displays the user’s profile.
3. Click the
Privileges tab, expand the individual folders, check the features to be enabled, and click
OK.
Host and Host Group Administration
Enable the permission to set and remove Host Attributes under the Security section.
• Browse Hosts - Enables the user to Search for hosts on the Host Group Administration page. It also provides the Host Management page in read-only mode.
• Manage Hosts - Provides the user access to view and modify host details. Adding, editing and removing hosts from host groups is also permitted. The Manage Hosts permission includes Browse Hosts permissions.
• Manage Host Groups - Provides the user the ability to manage host group membership: add/remove, move. Note: If you attempt to remove a host that is the only member in a group and it will become an orphan by removing it from this group. You must also have the Manage Hosts permission.
• Permanently Delete Hosts - Manage Hosts enables the user to remove hosts from groups. This privilege enables the user to permanently delete them from the system.
• Import Hosts from CSV - Enables the user to use a CSV file to add/update hosts from an external source and ultimately manage them from the Host Management page. If you are a Managed Services Provider, each of your customers will have a unique domain with its own host group hierarchy.
Enabling All Privileges in a Category
For User and User Group administration, you can configure privileges for individual functions, or you can configure access for an entire category of privileges.
Note: The following procedure assumes that you already have created the user or user group. This procedure also can be used when creating a new user or group.
To enable all privileges within a category
1. Select Admin > Users > Users and Privileges. The window displays all Portal users.
2. Double-click a user.
3. Click the Privileges tab.
4. Click the category folder—Reports, Policies, or Administration—to select it. Note that you can expand folders and then select sub-folders to enable all functions within a particular sub-folder.
5. Click Select Children to select all items in the group. If you expand the folder you just selected, you’ll see that all folders within that category have been selected.
6. Click OK.