Managing Objects in the Inventory List View
The Inventory List view enables you to manage individual objects and groups of objects. For groups of objects, you must be in the Inventory List view to perform management operations. Individual objects display management functions when you drill into their report view. The following operations are available for some objects:
Note: These functions are privilege-based and not available for all object types.
Additional management operations are available for Hosts and Backup Servers:
Assigning Attributes in the Inventory List View
Use the
Inventory List view to assign attributes and select their values within the
Inventory Navigator. Once attributes are created and their values defined, you can assign their values to objects represented in the
Inventory. A set of predefined
System Attributes are included in the Portal software. Once values are defined for the system attributes, you can assign them. In the
Inventory List view, you can select a single object or a group of objects and assign or modify attribute values associated with them.
About Attributes
Attributes provide a way of defining a set of objects that share a certain characteristic. Attributes represent logical relationships between objects and their relevant characteristics. Typically, you’ll set up attributes to aid in defining the scope of a report. For example, you might set up a “maintenance contract” attribute that you can associate with the hosts for which you have service coverage. Or, you might create an attribute to organize backup servers by geographical location so that the administrators responsible for the hosts at each corporate location can generate reports for their specific sites.
You can select hosts in bulk and assign or modify attributes associated with them. Use basic or advanced search to create a results set with the hosts you’d like to modify. For example, you can create a search query to find all Windows 2008 R2 systems as reported by NetBackup. When the search results are displayed, you can quickly apply a custom attribute such as patch applied.
See also:
Attribute Limitations
• Attributes cannot be assigned to LUNs, EC2 Instances, S3 Buckets, Azure Storage Accounts or Azure Virtual Machines.
• If an attribute has more than 400 values, and is assigned to an object, they are displayed as one value and labelled Aggregated for <n> values. Best practice is to limit attribute values to 50 total. This is applicable for:
• The Host Overview report
• A value displayed in a grid column for the attribute
• The Inventory Hierarchy will show as a single group with the label as the count value
• Contact APTARE Global Support Services for additional information.
To assign attributes and set values in bulk
1. Select
Inventory.
2. Navigate to the object category.
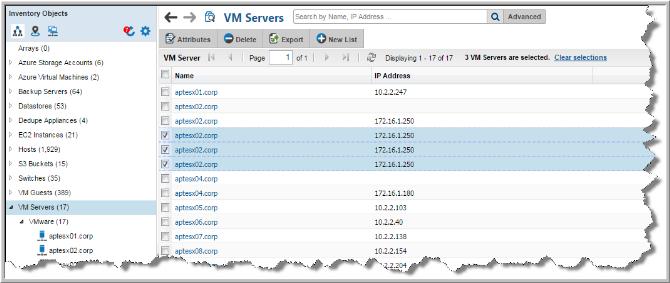
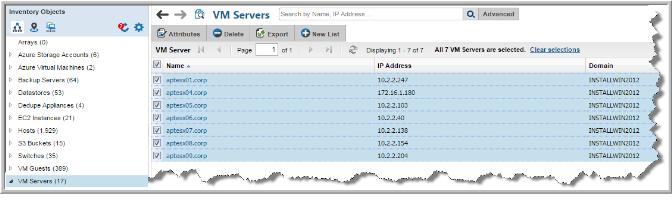
3. Toggle to the Inventory List view. You can select all the objects on the page by clicking the checkbox on the top of the management page. Note that only the objects displayed on a single page are selected.
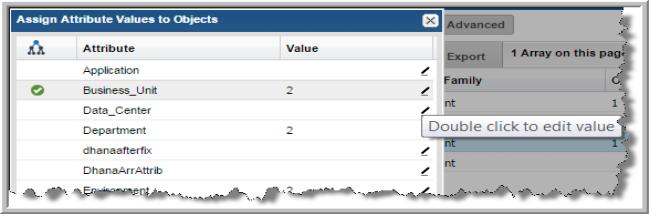
4. Click Attributes. The Assign Attribute Values to Objects dialog shows if attributes are actively used in the Inventory hierarchy. It also allows you to set or modify an attribute (or multiple attributes) for all the inventory objects selected. If no value is set for an attribute, the field is blank. If different attributes’ values are set for the selected objects, the value displays Multiple Values.
5. Double-click the
Value field beside the attribute. A drop-down list is activated.

6. Choose a value to assign to the selected hosts. If the value is displayed as Multiple Values, the new value is applied to all selected hosts and will overwrite any previously set attribute. You can set multiple attributes at once.
Setting Attribute Values in the Inventory List View
You can select different attribute values or remove them entirely in the Inventory List view. You can do this on an individual object or on a set of objects. These instructions cover how to modify attributes in bulk.
To remove attribute values on objects in bulk
1. Select
Inventory.

2. Toggle to the Inventory List view.
3. Enter your filter criteria to find your target set of objects.
4. Navigate to and select the objects to manage. You can select all the objects on a page by clicking the checkbox on the top of the management page. Note that only the objects displayed on a single page are selected.
5. Click Attributes. The Assign Attribute Values to Objects dialog allows you to set or modify attribute values for all the objects selected.
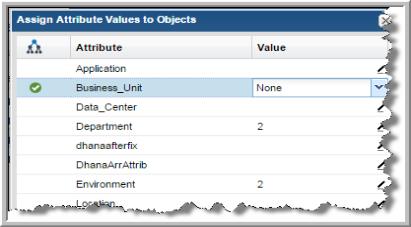
6. In the Assign Attribute Values to Objects dialog, double-click an attribute to set an attribute value. If different attributes’ values are set for the selected hosts, the value displays Multiple Values.
7. Click the
Value field beside the attribute you want to remove. The field is activated.
8. Select
None to remove the value. If you selected multiple objects, the attribute is removed from all your selections. You can remove multiple attributes and values at once.
Exporting Objects from the Inventory List View
You can export selected objects from the Inventory List view and download them to an Excel spreadsheet.
1. Select a category in the Inventory hierarchy panel.
2. Click the Go to Inventory List icon.
3. Select an object type, for example Hosts.
4. Select the objects to export. Click the top checkbox to select all objects on the page.
5. Click Export. The objects and the displayed columns are exported to an Excel spreadsheet and automatically downloaded.
Deleting Objects using the Inventory List View
If you choose to delete an object (if you have privileges) you are irretrievably deleting the object from the reporting database. All related historical data will also be permanently deleted from the database and unavailable in all reports. A pop-up window warns you of this action to prevent inadvertent deletions. This is an audited action and requires a password before deletion can proceed.
When you delete a host, it removes everything related to the host except the VM Server. To remove the related VM Server, you just explicitly delete it using the Inventory window. This prevents servers from being orphaned in the database.
In most cases, you should remove a host from a group, thereby un-linking it from its relationship with other machines in that group.
To delete objects using the Inventory
Note: VM Guests, individual LUNs, S3 Buckets, EC2 Instances, Azure Storage Accounts, Azure Virtual Machines and datastores cannot be deleted.
1. Select Inventory.
2. Select the object type category and expand to view.
3. Toggle to the Inventory List view.
4. Select an individual object or you can multi-select.
5. Click Delete. Remember all related historical data will also be permanently deleted from the database and unavailable in all reports. Two confirmation dialogs are displayed.
6. Enter your password. This is the same password with which you logged into StorageConsole. This information is captured in the log files.
Customizing Columns in the Inventory List View
To create a custom view of your data center inventory, choose the columns to display on the page. The columns available for selection are based on your StorageConsole licenses, collected data within the your domain, and
pre-built custom attributes. Once selected, sort and move these columns to your preference. Attributes can also be displayed as a column in the
Inventory List view.
See
Selecting Columns on Management Pages.
Note: The Host Group column, displayed in the Inventory for the Host Group management view, has sorting disabled to improve portal performance.