Installing Data Collectors
Follow the steps in the following sections to install the Data Collector on the Data Collector Server. The particular sequence of instructions depends on your environment. The majority of installations are initiated from the Data Collector Installation CD, however, if you are installing remotely or your Portal is being HOSTED by a service provider, you may need to download the Data Collector software via the Internet.
In addition to the GUI version, the installer supports a console (command line) interface for Linux systems that do not have X-Windows installed. You will be directed to the console interface instructions, if appropriate.
Note: Log in as a Local Administrator in order to have the necessary permissions for this installation.
Installing from the Data Collector CD
1. Perform installation as user root, or as an Administrator user on Windows.
2. Note the Platform/OS of the Data Collector Server on which you want to install the Data Collector.
3. Mount the APTARE StorageConsole Data Collector CD.
• On Windows:
• ActiveX controls must be allowed.
• The installer should load automatically. If not, navigate to the file CD_DRIVE/install.htm and open it in a browser and click Start Installer.
• On Linux:
If the Data Collector Server has X-Windows:
Open the file CD_DRIVE/install.htm in a browser.
If the Data Collector Server does not have X-Windows:
• Copy the file CD_DRIVE/InstData/<OS>/VM/<installer_file> to a temporary directory on the Data Collector Server (Refer to the following table for OS and Installer File Names) and run this executable.
OS | Data Collector Installer File Name |
Linux | sc_datacollector_linux_9101_<MMDDYYYY>.bin |
Windows | sc_datacollector_win_9101_<MMDDYYYY>.exe |
• Proceed to the Console Installation Instructions.
Installing Using the Internet
Follow these instructions if you do not have a CD and you are installing on a Data Collector Server that has Internet access and a web browser.
1. Start the web browser on the Data Collector Server.
2. Go to the Downloads site in the Customer Portal at www.aptare.com and click on the relevant download link.
3. Select the Data Collector Installer that corresponds to the platform of the Data Collector Server.
OS | Data Collector Installer File Name |
Linux | sc_datacollector_linux_9101_<MMDDYYYY>.bin |
Windows | sc_datacollector_win_9101_<MMDDYYYY>.exe |
4. Execute the OS-specific Data Collector installer.
Internet Access Not Available from the Data Collector Server
Use these instructions if you are installing via the Internet where Internet access is not available from the data collector server.
1. Note the Platform/OS of the Data Collector Server on which you want to install the Data Collector.
2. Open a browser on a client with web access (you will download the installer to this client, and then copy it to the Data Collector Server).
3. Go to the Downloads site in the Customer Portal at www.aptare.com and click on the relevant download link.
4. Download the Data Collector Installer that corresponds to the platform of the Data Collector Server.
OS | Data Collector Installer File Name |
Linux | sc_datacollector_linux_9101_<MMDDYYYY>.bin |
Windows | sc_datacollector_win_9101_<MMDDYYYY>.exe |
5. At the prompt, save the Data Collector Installer to a directory on the client.
6. Copy the Data Collector Installer to the Data Collector Server where the Data Collector is to be installed.
7. Go to the Data Collector Server and run the installer.
• On Windows:
Execute sc_datacollector_win_9101_<MMDDYYYY>.exe
• On Linux:
If the
Data Collector Server has X-Windows, take these steps, substituting the relevant Data Collector Installer name for
<installer_file>, as listed in
Step 4.
chmod +x <installer_file>
sh ./<installer_file> –i swing
If the Data Collector Server does not have X-Windows:
• Proceed to the Console Installation instructions.
GUI Deployment of the Data Collector
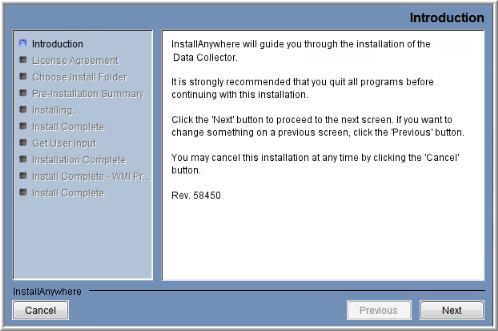
InstallAnywhere will prepare to install the Data Collector software. After checking the available disk space and downloading the installer, an introduction dialog window outlines the installation process.
1. Review the installation process and click Next.
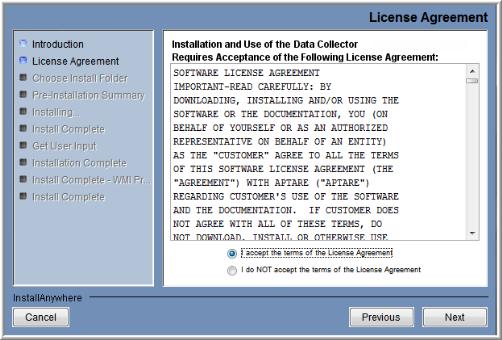
The License Agreement displays for your acknowledgement.
2. Read the agreement and click the “I accept” radio button and then Next.
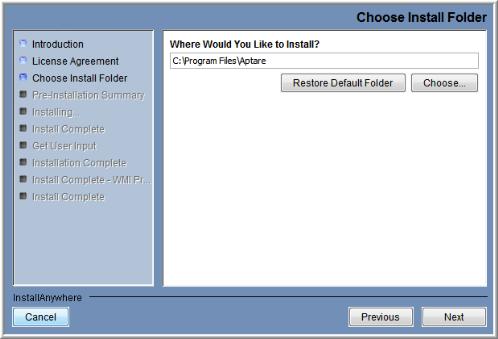
The installer will display a window, which prompts you for an Install Folder.
3. Specify the directory where you would like to install the Data Collector software.
Accepting the default paths is recommended.
Windows default directory: C:\Program Files\Aptare
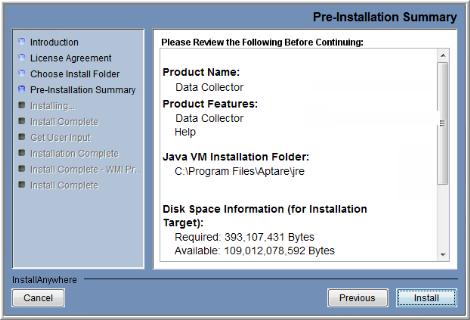
4. Click Next to display the Pre-Installation Summary.
5. Review the summary and click Install. The dialog tracks the installation as it progresses.
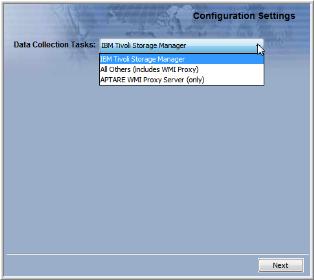
6. A Configuration Settings window will prompt you to select a Data Collection Task. The configuration choices include: IBM Tivoli Storage Manager, or All Others—which currently includes the backup products: Symantec Backup Exec, Symantec NetBackup, HP Data Protector, EMC Avamar, EMC Data Domain, EMC NetWorker, CommVault Simpana, Generic Backup; and the capacity/storage products: EMC Isilon, EMC VNX (CLARiiON), EMC VNX (Celerra), EMC Symmetrix, HP 3PAR, HP EVA, Hitachi Data Systems, Hitachi NAS, NetApp, IBM Enterprise, IBM Modular, IBM SVC, IBM VIO, IBM XIV, Host Resources; and also, Brocade Switches, Cisco Switches, McData Switches, VMware, and File Analytics Shares.
7. Using the All Others selection, a single Data Collector can be installed for multiple products on a single server. When you select a backup product, if you are installing on a Windows server, the WMI Proxy Server is automatically included with the installation. When you select a storage array, the Host Resources setup is automatically included in the installation. The WMI Proxy Server also can be installed individually.
8. When prompted to select a Backup Product, choose All Others or IBM Tivoli and click Next.
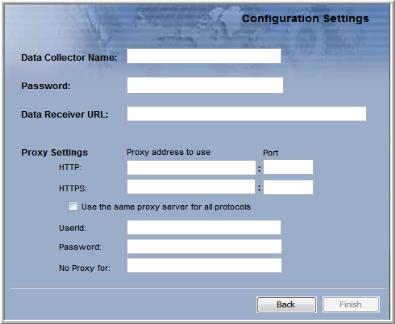
9. Enter the configuration settings for your particular environment.
Field | Description |
Data Collector Name * | A unique name assigned to this Data Collector. This is the name that you used during the Pre-Installation setup. The Data Collector will use this value for authentication purposes. |
Password * | The password assigned to this Data Collector. The password is encrypted prior to saving in the StorageConsole database and is never visible in any part of the application. |
Data Receiver URL * | This is the URL the Data Collector uses to communicate to the Portal server. The format of this URL should be: http://aptareagent.yourdomain.com It is similar to the URL you use to access the web-based Portal (http://aptareportal.yourdomain.com). IMPORTANT NOTE: Be sure to enter the URL with the prefix aptareagent and NOT aptareportal. |
Proxy Settings (Optional) | Enter the proxy server details for both http and https, including the User ID and Password for the server. HTTP/HTTPS: Enter a hostname or IP address and a port number. Use the same proxy server for all protocols: Check this box if the proxy server is used for all. User ID & Password: Enter the credentials for the proxy server. No Proxy for: List hostnames or IP addresses that will not be proxied.
Examples: 192.168.1.1/21, localhost |
* Denotes a mandatory configuration.
10. After entering the configuration settings, click Next.
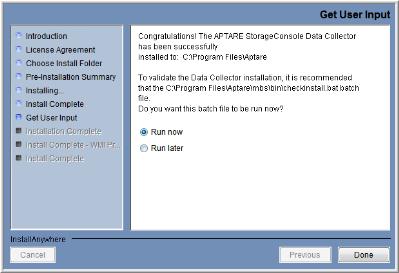
At this point, the Data Collector has been successfully installed, however, to validate the Data Collector installation, it is recommended that you run the C:\Program Files\Aptare\mbs\bin\checkinstall.bat batch file.
11. Choose Run now and click Done in the Get User Input window to validate the installation and then quit the installer.
The InstallAnywhere portion of the installation is now complete and the process continues with the command-line script execution.
Console Installation Instructions
Follow these instructions when installing on a Linux server that does not have X-Windows. The Installer will guide you through the sequence of steps to install and configure the Data Collector. If at any time you need to go back a step, simply type ‘back’ at the prompt.
Note: The StorageConsole Data Collector installer does not support console-based installation for the Windows operating system.
1. From your telnet session cd to the location where the Data Collector Installer file has been saved.
2. Execute the following commands, substituting the relevant Data Collector Installer name for <installer_name>.bin.
chmod +x <installer_name>.bin
sh ./<installer_name>.bin –i console
3. InstallAnywhere will prepare to install the Data Collector software.
=====================================================
(created with InstallAnywhere by Macrovision)
-----------------------------------------------------
Introduction
------------
InstallAnywhere will guide you through the installation of the APTARE StorageConsole Data Collector.
It is strongly recommended that you quit all programs before continuing with this installation.
Respond to each prompt to proceed to the next step in the installation. If you want to change something on a previous step, type 'back'.
You may cancel this installation at any time by typing 'quit'.
PRESS <ENTER> TO CONTINUE:
4. The License Agreement will be displayed.
License Agreement
-----------------
Installation and use of APTARE StorageConsole requires acceptance of the following License Agreement:
PLEASE READ THIS SOFTWARE LICENSE AGREEMENT CAREFULLY. BY DOWNLOADING, INSTALLING OR USING THE SOFTWARE YOU INDICATE ACCEPTANCE OF AND AGREE TO THETERMS AND CONDITIONS OF THIS AGREEMENT….<etc.>
5. Read the agreement and type Y to accept it.
6. The installer will prompt for the installation location:
Choose Install Folder
---------------------
Where would you like to install?
Default Install Folder: /opt/aptare
ENTER AN ABSOLUTE PATH, OR PRESS <ENTER> TO ACCEPT THE DEFAULT
: /opt/aptare
INSTALL FOLDER IS: /opt/aptare
IS THIS CORRECT? (Y/N): y
7. A Pre-Installation Summary will be displayed.
==================================================
Pre-Installation Summary
------------------------
Please Review the Following Before Continuing:
Product Name:
APTARE StorageConsole
Install Folder:
/opt/aptareagent
Link Folder:
/tmp/install.dir.30662/Do_Not_Install
Product Components:
APTARE StorageConsole Agent,
Help
Java VM Installation Folder:
/opt/aptareagent/jre
Disk Space Information (for Installation Target):
Required: 136,083,162 bytes
Available: 3,786,149,888 bytes
PRESS <ENTER> TO CONTINUE:
8. The installation process will track the progress:
==================================================
Installing...
-------------
[==================|==================|=============]
[------------------|------------------|-------------]
9. You will be prompted to select a product.
Enter Backup Product
(Choose the Backup Product for which you want to install the Agent/Data Collector.)
(Required Field)
->1- IBM Tivoli Storage Manager
2- All Others
ENTER THE NUMBER FOR YOUR CHOICE, OR PRESS <ENTER> TO ACCEPT THE DEFAULT:
:
On the Data Collector server, during the Data Collector installation/configuration, the configuration choices include: IBM Tivoli Storage Manager, or All Others—which currently includes the backup products: Symantec Backup Exec, Symantec NetBackup, HP Data Protector, EMC Avamar, EMC Data Domain, EMC NetWorker, CommVault Simpana, Generic Backup; and the capacity/storage products: EMC VNX (CLARiiON), EMC VNX (Celerra), EMC Symmetrix, HP 3PAR, HP EVA, Hitachi Data Systems, NetApp, IBM Enterprise, IBM Modular, IBM SVC, IBM VIO, IBM XIV, Host Resources; and also, Brocade Switches, Cisco Switches, McData Switches, VMware, and File Analytics Shares. After installing the Data Collector software on the Data Collector server, run checkinstall to validate connectivity.
10. The installer will prompt for the Data Collector Name. This is the ID that will be used on the Portal side to authenticate the Data Collector. This value should be the same value you configured on the Portal for the field “ID” during the Pre-Installation step.
Enter Data Collector Name
(Required Field)
Data Collector Name (DEFAULT: ):
11. The installer will prompt for the Data Collector Password. This is the password that will be used on the Portal side to authenticate the Data Collector. This value should be the same value you configured on the Portal for the field “passcode” during the Pre-Installation step.
Configuration Settings - 2
--------------------------
Enter Data Collector Password:
(Please enter the Password, which will be used to authenticate the Data
Collector with the Data Receiver)
(Required)
Data Collector Password: password1
12. The installer will prompt for the Data Receiver URL. This is the URL the Data Collector uses to communicate to the Portal server. This is the URL the Data Collector uses to communicate to the Portal server. The format of this URL should be:
http://aptareagent.yourdomain.com
It is similar to the URL you use to access the web-based Portal (http://aptareportal.yourdomain.com).
IMPORTANT NOTE: Be sure to enter the URL with the prefix aptareagent and NOT aptareportal!
Configuration Settings - 3
--------------------------
Enter Data Receiver URL
(Required Field)
Data Receiver URL (DEFAULT: ): http://aptareagent.yourdomain.com
The installer will perform a post-install validation:
The installer will now configure the installation.
This may take a few minutes.
13. Web Proxy (HTTP) settings can be configured.
===============================================================================
Configuration Settings- 4
---------------------------
Connection Settings
Use Proxies? (Y/N) (DEFAULT: N): y
===============================================================================
Configuration Settings - 5
--------------------------
Enter HTTP Proxy IP Address
(Please leave field empty if there is no Proxy/Firewall)
HTTP Proxy IP Address (DEFAULT: ): 10.2.2.116
===============================================================================
Configuration Settings - 6
--------------------------
Enter HTTP Proxy Port
(Please leave field empty if there is no Proxy/Firewall)
HTTP Proxy Port (DEFAULT: ): 3128
===============================================================================
Configuration Settings - 7
--------------------------
Enter HTTPs Proxy IP Address
(Please leave field empty if there is no Proxy/Firewall)
HTTPs Proxy IP Address (DEFAULT: ):
===============================================================================
Configuration Settings - 8
--------------------------
Enter HTTPs Proxy Port
(Please leave field empty if there is no Proxy/Firewall)
HTTPs Proxy Port (DEFAULT: ):
===============================================================================
Configuration Settings - 9
--------------------------
Enter Proxy UserId
(Please leave field empty if there is no Proxy/Firewall)
Proxy UserId (DEFAULT: ):
===============================================================================
Configuration Settings - 10
---------------------------
Enter Proxy Password
(Please leave field empty if there is no Proxy/Firewall)
Proxy Password:
===============================================================================
Configuration Settings - 11
---------------------------
Enter comma separated IP Addresses to exclude from Proxy
(Please leave field empty if there is no Proxy/Firewall)
No Proxy for (DEFAULT: ):
===============================================================================
The installer will now configure the installation.
This may take a few minutes.
PRESS <ENTER> TO CONTINUE:===================================
Installation Complete
-----------------------------------
To validate the Data Collector installation, it is recommended that you run the <home>/mbs/bin/checkinstall.sh script.