Adding/Configuring a Domain
A Domain identifies the top level of your host group hierarchy. At the Domain level, you:
If you are a Managed Services Partners, you will create a domain for each of your customers. Each domain must be associated with a host group that serves as the root of the customer’s host group hierarchy. In this way, you can manage each customer environment separately.
For additional information about Domains, see
Root Folder and Domains.
To create a new domain
1. Choose Admin > Domains > Domains.
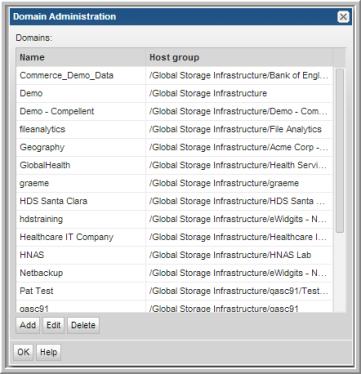
3. In the Domain Administration window:
• Enter a domain name.
• Expand the host group list, then click on a host group that will be the home host group for this domain—that is, the host group that should be the root of the domain’s hierarchy.
• Click OK to create the domain.
Note: A host group can serve as the root for only one domain. For example, you could have an Acme domain and then assign the Acme Corp host group to this domain. Once a domain is associated with a host group, this host group cannot become the root of any other domain.
Configure Alerting for a Domain
The over arching rules for alerting are defined at the domain level.
To configure Alerting at the domain level
1. Select Admin > Domains > Domains.
2. On the Domain Administration window, click the Alerting tab.
3. Enter the Port, Community, and Management servers to be used as the default values when an SNMP Alert is configured for a saved report.
4. Configure the check boxes for the delivery methods that you want to be associated with this domain. By default, only email is enabled for all domains. Email is not an optional setting shown in the Domain Administration list.
The following methods must be granted permission at the domain level:
• Script
• SNMP
• Native Log - When this box is checked, a log entry is written to the OS-specific log: either the Windows event log or the Linux syslog.
5. Click OK to save the configuration.
Community Performance Statistics for a Domain
To configure Community Participation at the Domain level
Before you can share array performance statistics with similarly configured arrays in the broader community to gauge your environment’s performance, you must enable Community participation.
Performance profiles are securely transmitted (over https) as anonymous and aggregated with other customers’ profile data in Profile Central—the community pool hosted at APTARE, Inc., which is then imported into a customer’s profile for reporting purposes. This import/export task occurs in a single, daily scheduled Portal process. Using the aggregated community profiles, companies can better gauge if the metrics collected in their environments are within a normal performance range. Profile data cannot be associated with any contributor. No company or environment-specific details, such as storage array or hosts, are transmitted. No personally identifiable information is collected, used, or disclosed.
The Administrator can enable participation in two different ways—either will enable participation for the arrays in the specified Domain:
•
Configure Community Performance Profiling: This enables a multi-domain organization (such as a Managed Services Provider) to configure participation on a Domain-by-Domain basis, selecting only the Domains that are authorized to participate.
IMPORTANT: To enable participation in Community Performance Profiling Cloud Policies, an authorized representative of your company must opt-in. See
Adding/Editing a Cloud Policy to Share Performance Statistics.
1. Select Admin > Domains > Domains.
2. Select a domain name.
3. Click Edit.
4. Click the Community tab in the Domain Administration window.
5. Click Participate in APTARE community program, then click OK.