Field | Description | Sample Value |
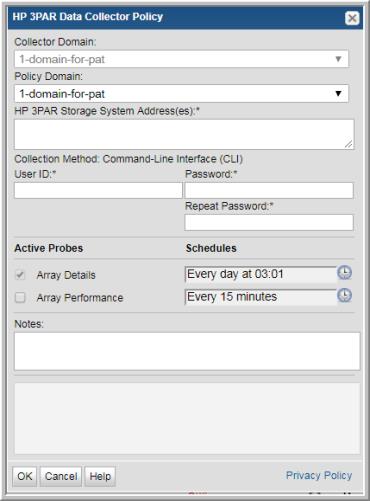
Collector Domain | The domain of the collector to which the collector backup policy is being added. This is a read-only field. By default, the domain for a new policy will be the same as the domain for the collector. This field is set when you add a collector. | |
Policy Domain | The Collector Domain is the domain that was supplied during the Data Collector installation process. The Policy Domain is the domain of the policy that is being configured for the Data Collector. The Policy Domain must be set to the same value as the Collector Domain. The domain identifies the top level of your host group hierarchy. All newly discovered hosts are added to the root host group associated with the Policy Domain. Typically, only one Policy Domain will be available in the drop-down list. If you are a Managed Services Provider, each of your customers will have a unique domain with its own host group hierarchy. To find your Domain name, click your login name and select My Profile from the menu. Your Domain name is displayed in your profile settings. | yourdomain |
HP 3PAR Storage System Address(es)* | Enter a comma-separated list of IP addresses or host names of the HP 3PAR Storage Systems from which you want to collect data. | 3PAR_server1 |
Collection Method | The Command Line Interface (CLI) is the only available method for HP 3PAR data collection. This method logs in to the HP 3PAR Storage System via SSH and uses the command line for data collection. | |
User ID* | Specify the User ID for the HP 3PAR Storage Systems. The User ID and Password must be the same for all systems identified in the Host Address field. The HP 3PAR user account should have been created with Browse rights. | Admin |
Password* | Enter the password associated with the User ID. Note: The password is encrypted prior to saving in the database and is never visible in any part of the application. | Password1 |
Array Details | Select the check box to activate the array details collection. Click the clock icon to create a schedule frequency. You schedule the collection frequency by minute, hour, day, week and month. Advanced use of native CRON strings is also available. Note: Explicit schedules set for a Collector policy are relative to the time on the Collector server. Schedules with frequencies are relative to the time that the Data Collector was restarted. | |
Array Performance | Select the check box to activate performance collection. Note that at least one collection from this array must be performed BEFORE array performance data can be collected. Click the clock icon to create a schedule frequency. You can schedule the collection frequency by minute, hour, day, week and month. Advanced use of native CRON strings is also available. Note: Explicit schedules set for a Collector policy are relative to the time on the Collector server. Schedules with frequencies are relative to the time that the Data Collector was restarted. | |
Notes | Enter or edit notes for your data collector policy. The maximum number of characters is 1024. Policy notes are retained along with the policy information for the specific vendor and displayed on the Collector Administration page as a column making them searchable as well. |