Field | Description | Sample Values |
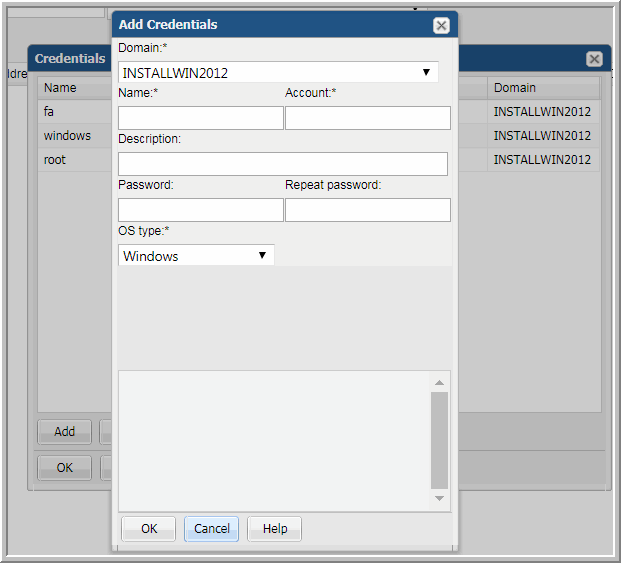
Domain* | Select the APTARE IT Analytics Domain from the list; for most environments, only one Domain is displayed. Multiple domains facilitate management for Managed Services Partners (MSPs). | |
Name* | Assign a name to identify this set of credentials that you are defining. | |
Account* | Enter the login account name used to log in to the hosts. If the policy includes a group of Windows hosts, use the Windows domain user id. This user id must have administrative privileges. For Linux hosts, super user root privileges are required. You also could use an access control command, such as sudo, sesudo, or pbrun. If using any of these access commands, ensure that the user ID has sudo, sesudo, or pbrun privileges. Some enterprises prefer to create a new user and provide access to commands via an access control command. Files containing sudo commands per operating system can be found on the Portal server in: /opt/aptare/updates. See also, Manage Access Control. | root |
Description | Enter a note to help identify this type of credential | Linux logins for Corporate |
Password | Enter the password for the account | Password1 |
OS type* | Select either Linux, Windows, or NAS. | |
Windows Domain | For Windows hosts only: If any of the hosts specified in the Host address field are Windows hosts, you need to specify the Windows domain name. If the host is not a member of a domain, or to specify a local user account, use a period (.) to substitute the local host SSID for the domain. | win2kdomain |
Private Key File | For Linux hosts only: If you have configured Public Key/Private Key between your Data Collector server and the Hosts you intend to monitor, use this field to specify the location of the Private Key file on the Data Collector server. | /root/.ssh/id_rsa or C:\Program Files\Aptare\mbs\conf\id_rsa |
Known Hosts File | For Linux hosts only: If you have configured Public Key/Private Key between your Data Collector server and the Hosts you intend to monitor, use this field to specify the location of the Known Hosts file on the Data Collector server. | /root/.ssh/known_hosts or C:\Program Files\Aptare\mbs\conf\known_hosts |
Field | Description | Sample Values |
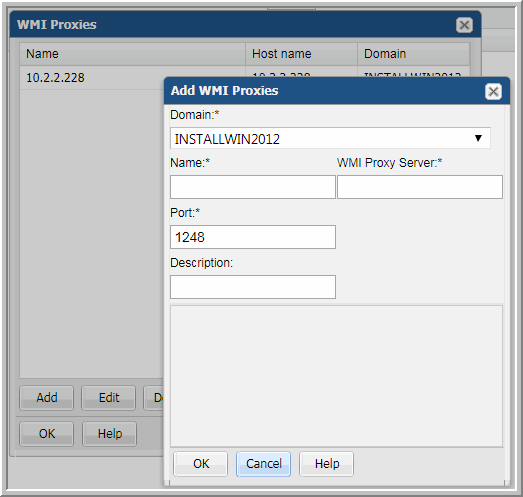
Domain* | Select the APTARE IT Analytics Domain from the list; for most environments, only one Domain is displayed. Multiple domains facilitate management for Managed Services Partners (MSPs). | |
Name* | Assign a name to identify this set of credentials that you are defining. | |
WMI Proxy Server* | This is the server address of the WMI proxy, which collects data on Windows hosts. Enter either the server’s IP address or name. | CorpWin2k |
Port* | The port that the Data Collector will use to contact the WMI Proxy; usually, there is no need to change the default setting (1248). | 1248 |
Description | Enter a note to help identify this WMI Proxy setting |
Field | Description | Sample Values |
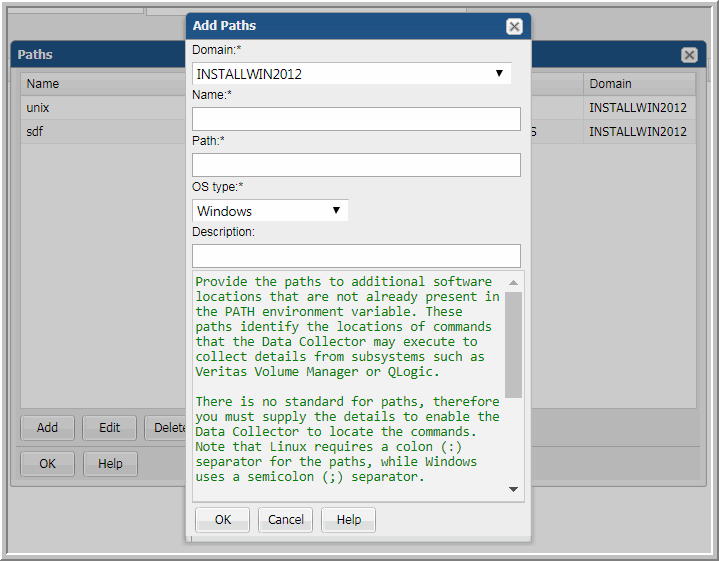
Domain* | Select the APTARE IT Analytics Domain from the list; for most environments, only one Domain is displayed. Multiple domains facilitate management for Managed Services Partners (MSPs). | |
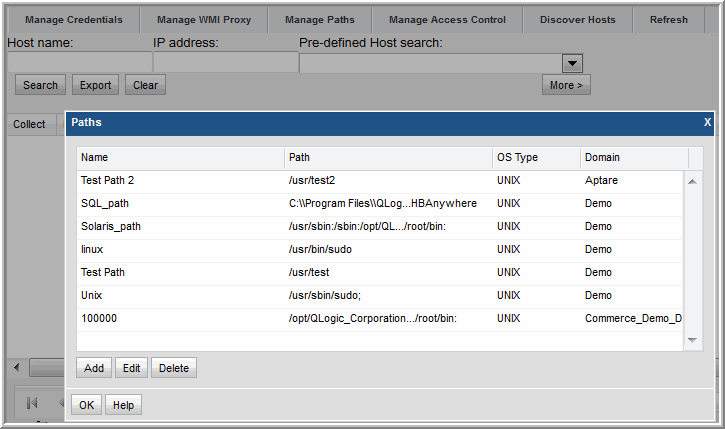
Name* | Assign a name to identify this Paths setting that you are defining. | |
Path* | Provide the paths to additional software locations that are not already present in the PATH environment variable. These paths identify the locations of commands that the Data Collector may execute to collect details from subsystems such as Veritas Volume Manager or QLogic. There is no standard for paths, therefore you must supply the details to enable the Data Collector to locate the commands. Note that Linux requires a colon (:) separator for the paths, while Windows uses a semicolon (;) separator. Examples: Linux: /opt/QLogic_Corporation/SANsurferCLI:/usr/local/sbin:/usr/local/bin:/sbin:/bin:/usr/sbin:/usr/bin:/root/bin:/opt/EMLXemlxu/bin:/usr/sbin/hbanyware:/opt/HBAnyware Windows: C:\Program Files\Emulex\Util\HBAnyware;C:\Program Files\QLogic\SANSurfer | |
OS type* | Select either Linux or Windows | |
Description | Enter a note to help identify this Path setting |
Field | Description | Sample Values |
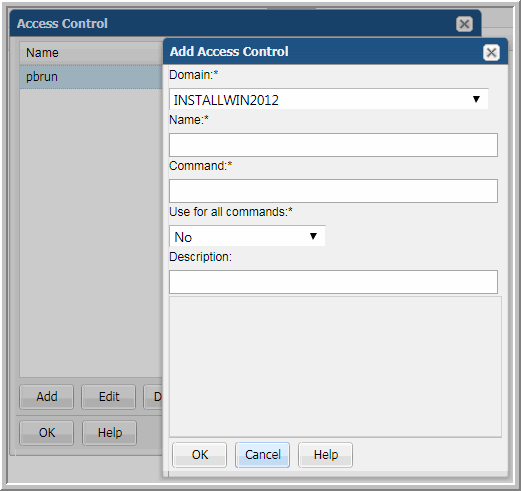
Domain* | Select the APTARE IT Analytics Domain from the list; for most environments, only one Domain is displayed. Multiple domains facilitate management for Managed Services Partners (MSPs). | |
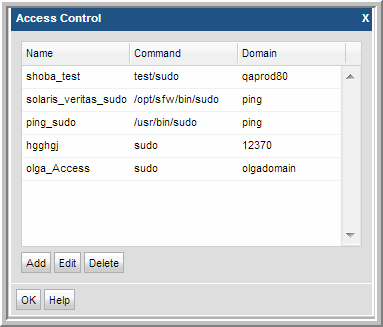
Name* | Assign a name to identify this Access Control setting. | |
Command* | Linux hosts only: Provide the full path to the access control command, such as sudo, sesudo, or pbrun. Files containing sudo commands per operating system can be found on the Portal server in: /opt/aptare/updates. These filenames contain both the OS and the version of the sudo commands file so that you can identify the files that contain the latest updates; for example: hpux_9.1.01, aix_9.1.01, linux_9.1.01, solaris_9.1.01. You can configure sudo to prompt for a password using a custom prompt (the default is “Password”). APTARE IT Analytics expects the prompt to be “Password.” If the hosts have a custom password prompt, you’ll need to specify -p Password after the path to sudo. See the example to the right. | /usr/bin/sudo /usr/local/bin/sudo -p Password |
Use for all command* | Select Yes to have the Data Collector use the access command for all commands. | |
Description | Enter a note to help identify this Access Control setting |