Managing Users and User Groups
Searching for Users and User Groups
Use
Search to locate Users and User Groups. See
Navigating with Search for details.
Editing User Accounts
When you create a user account, you create the user details, access privileges, group membership and a password. Users can modify their passwords and most of their profile information, however, they cannot modify their access privileges. Preferences for locale, number and date formatting are set by the user using the user account menu. See
Managing Your Profile.
1. Select Admin > Users > Users and Privileges. The window displays all Portal users.
3. Select a user and click
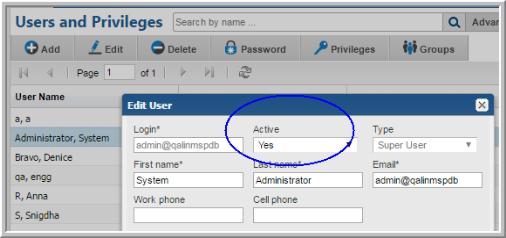
Edit. The
Edit User dialog is displayed.
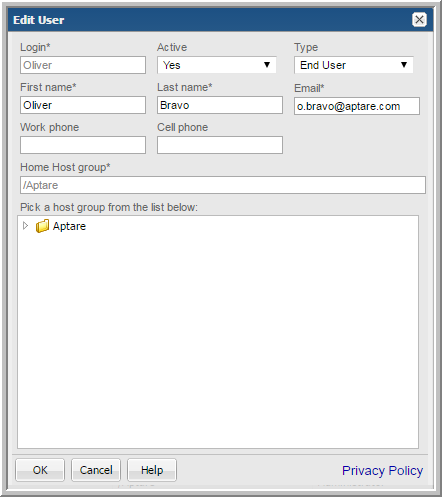
4. Revise the fields.
• Required fields are denoted with an asterisk. First name and last name fields are limited to 64 characters.
• The Login ID should be in an email format, as required by LDAP. This field is limited to 128 characters.
• From the selector, select the User Type. For a definition of the privileges associated with a user type, see
About User Types.
• Select a Home Host group. A home host group is a host group to which a user belongs. This limits a user’s access to data. A user can access any host groups that are lower in the hierarchy from the home host group.
5. Click OK to edit the user.
Setting/Resetting Passwords
Once you create a user, you need to assign an initial default password, for example, employee ID. The user can change this password from within the Portal.
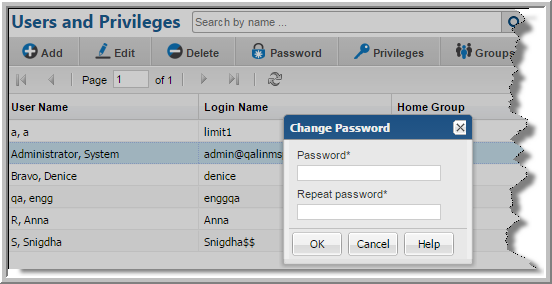
1. Select Admin > Users > Users and Privileges. The window displays all Portal users.
3. Select the user.
4. Click
Password and enter the password.
Password Notes
Passwords can include the equal sign (=) character.
Passwords are stored in the database using the following encryption algorithm:
• Algorithm: AES/CBC/PKCS5Padding
• Strength: 128-bit
Account Lockout
A user is allowed five attempts to login. If the user is unable to remember the password after five attempts, the account is locked. This value can be overridden by adding a line to the portal.properties file. See
Configuring the Number of Login Attempts Before Lockout for details.
An administrator must reactivate the account before the user can login.
To unlock the account
1. Click Admin>Users>Users and Privileges.
3. Select the user name and click Edit.
4. Change the Active field from No to Yes.
5. Click OK.
Managing User Group Home Pages (Administrator)
Home pages are associated with user account and display when a user logs into StorageConsole. Each user can assign a different report (or set of reports) as their home pages and they are launched automatically each time they log in.
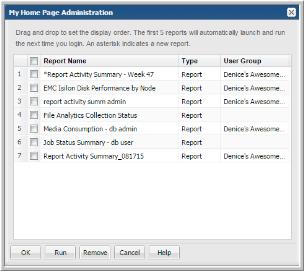
This functionality is also available for User Groups. System Administrators can designate a set of reports as home pages and assign them to User Groups. Each member of the User Group receives the designated home page set and they automatically launch each time the user logs in. These assigned reports are displayed on the user’s My Home Page Administration dialog along with any Home Page reports selected by the user.
When users belong to multiple User Groups with Home Pages assigned, all reports are combined, sorted and added to the member’s list of Home Pages.
My Home Pages and User Group Home Pages (Administrator)
When Home Pages are assigned through User Groups:
• Members can reorder the display order.
• Members cannot delete the reports. Members can always delete the reports they individually selected as Home Pages.
• Reports are automatically added for each User Group member when updated by an Administrator.
• Reports are automatically removed for each User Group member when deleted by an Administrator.
• Reports are removed for each User Group member when the User Group is deleted.
• Reports are automatically added to the top of the user’s Home Page list.
• New reports are flagged with an asterisk.
To designate reports or dashboards as User Group home page(s)
You can designate one or multiple reports as home pages for a User Group. You can add reports as home pages, however, only the first five reports listed on the logged in user’s My Home Page Administration dialog will automatically launch at login.
When reports are added using User Groups, the first five are added to the top of the display list. However, users manage the ultimate home page display order regardless of the assignment origin: user-selected or assigned through User Groups.
1. Generate a saved report or dashboard.
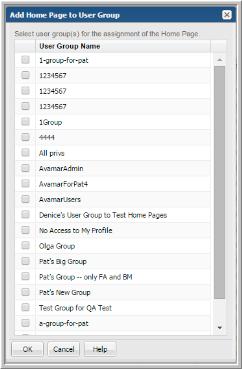
2. Right-click and select Add to User Group Home Pages. The Add Home Page to User Group dialog is displayed.
3. Select the User Group(s) for the assignment.
4. Click OK.
To add new reports to the home page set
New Home Pages added to a User Group with an existing list are automatically display at the top of the user’s Home Page list. By default, five reports can be added to the top of the list. This value is configurable. Refer to the
Configuring the Number of Home Pages to Display.
These new Home Pages display an asterisk (*) beside them on the user’s My Home Page Administration dialog to indicate they’ve been added through the User Group. Once the report is run, the asterisk is removed.
To remove a report or dashboard from User Group home pages
If all Home Pages are removed, the Inventory view is displayed (if the privilege is selected for a user). If privileges are not set, the Reports view is displayed. User Group assigned home pages are automatically removed from the individual users list when the Administrator removes them from the group.
Note: Individual users cannot remove home pages assigned through the User Groups. They must be removed from the User Group.
1. Select Admin > Users > User Groups.
2. Select the User Group Name.
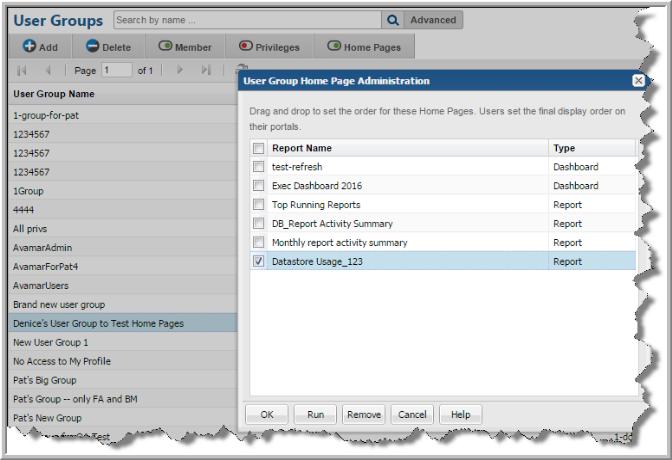
3. Click Home Pages. The User Group Home Page Administration dialog is displayed.
4. Select the reports (Home Pages) to remove.
5. Click Remove. The reports are automatically removed from the User Group's members' My Home Page Administration dialog. The report will be removed from the member’s list the next time they log in.
Removing Portal Users
Delete a user’s account if that user leaves the company, or if that user no longer needs access.
To remove a Portal user
1. Select Admin > Users > Users and Privileges. The window displays all Portal users.
3. Click the user name to select the user account to delete.
4. Click Delete, then confirm your changes.
Deactivating User Accounts
Consider deactivating a user’s account if that user does not intend to use the Portal for an extended period of time, such as in the event of an employee’s leave of absence. If you want to permanently suspend the user's account, go to
Removing Portal Users.
To deactivate a user account
1. Select Admin > Users > Users and Privileges. The window displays all Portal users.
3. Select the user to deactivate, and click Edit. The user’s profile is displayed on the Details tab.
4. Select No from the Active drop-down list, and click OK.