Creating Portal User Accounts
This procedure assumes that you identified the host group to which the user must belong, and that the host group or subgroup is available. Using host groups (or a home group), dictates how wide a net a user can cast when generating report data. When you create a user account, you specify a
home host group for that user. If not, go to
Planning Your Host Group Hierarchy.
About User Types
There are three portal user types:
User Type | Rights |
Administrator | Manage user accounts and set up host groups at or below the Administrator’s assigned group. An Administrator can create both End User and Administrator accounts, but only within the Administrator’s home group. In an MSP (Managed Services Provider) environment, each client has Administrator accounts that have access only to the client’s domain and only the host groups within that domain. |
Super User | A Super User’s privileges cannot be revised by any other user. Everything an Administrator can do in addition to the following: • Access the entire Portal host group hierarchy from top to bottom regardless of the user’s group assignment. • Manage Oracle table space. • Define and manage server backup cycles. • Create both End User and Administrator accounts for any group within the host group hierarchy. • Access all default and user-generated reports. • View New and Updated badging on system report templates when they are made available. See About Badging. |
End User | • Those features for which privileges have been granted by the Administrator. The end user will only be able to utilize those features at or below their assigned home group. • An End User can create only End User accounts within the user’s own home group (domain). |
To create a user account
When you create a user account, you add user details and a password. Users can modify their passwords and some of their profile information, however, they cannot modify their access privileges. Access privileges and group membership is setup through a separate operation.
Preferences for locale, number and date formatting are set by the user using the user account menu. See
Managing Your Profile.
1. Select
Admin >
Users >
Users and Privileges. The window displays all Portal users.
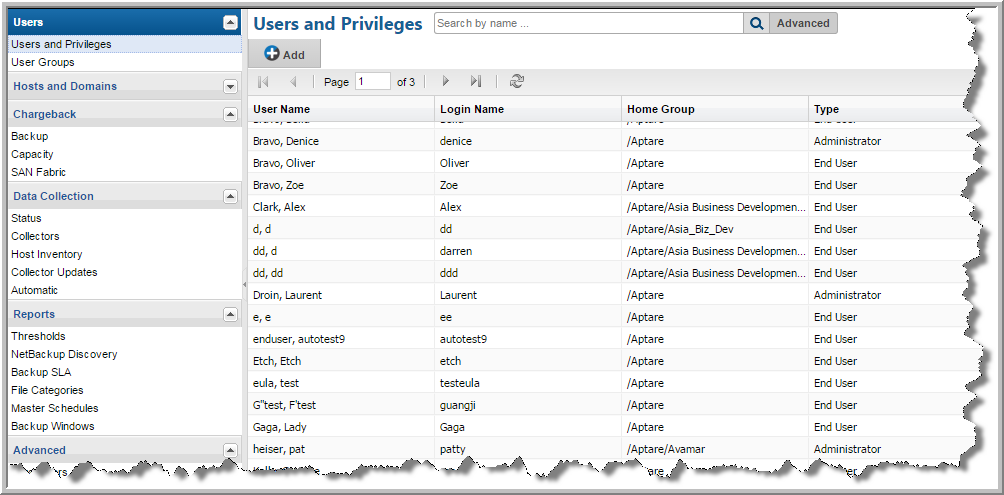
2. Click
Add to create a new user. The
Add User dialog is displayed.
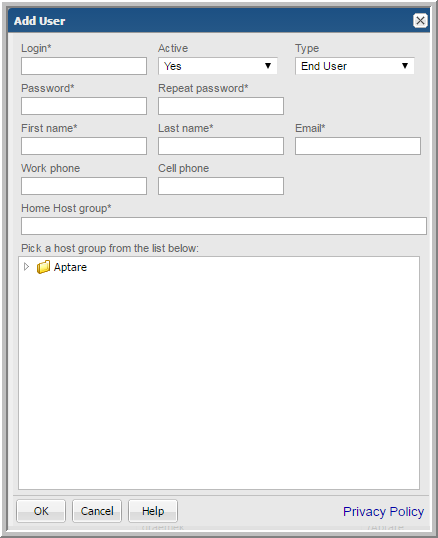
3. Complete the fields.
• Required fields are denoted with an asterisk. First name and last name fields are limited to 64 characters.
• The Login ID should be in an email format, as required by LDAP. This field is limited to 128 characters.
• From the selector, select the User Type. For a definition of the privileges associated with a user type, see
About User Types.
• Select a Home Host group. A home host group is a host group to which a user belongs. This limits a user’s access to data. A user can access any host groups that are lower in the hierarchy from the home host group.
4. Click OK to create the user.
Selecting User Groups for Users
User groups provide an efficient way of managing many users at once. You can assign privileges to a group and they are propagated to the users in that group. See also
Working with User Groups.
1. Select Admin > Users > Users and Privileges. The window displays all Portal users.
2. Select a user.
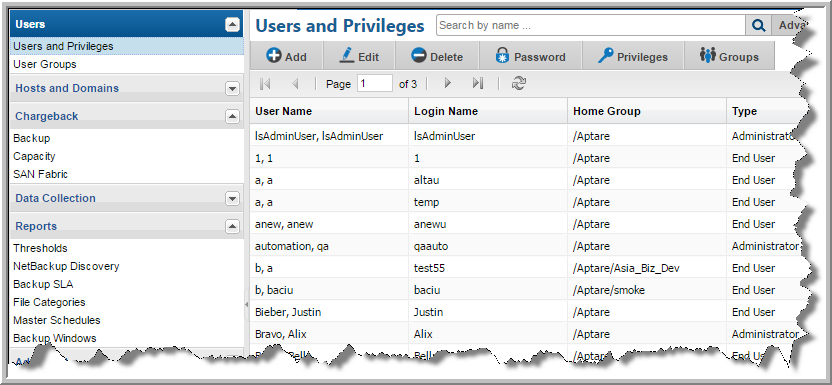
3. Click
Groups. The
Select User Groups dialog is displayed.
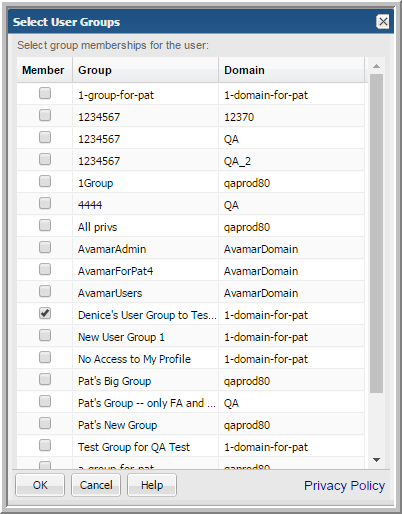
4. Click the groups to assign membership to the selected user.