Installation Overview (Commvault Simpana)
Note: These steps apply only if you are performing an IN-HOUSE installation. If a third-party service provider is hosting your Portal, that is, a HOSTED installation (perhaps for a product evaluation) skip this section and contact your hosting organization’s representative to configure the hosted portal for your Data Collector.
Open TCP/IP Access to the Commvault Database
The following steps assume that the Commvault database is installed on an MS SQL server instance named COMMVAULT. Substitute the appropriate instance name as required.
Note: MS SQL Server must be set to Mixed-mode authentication and the login to be used for collection must be using SQL authentication.
1. Expand SQL Server Network Configuration.
2. Click Protocols for <COMMVAULT>.
3. Double-click TCP/IP.
4. Verify Enabled is set to Yes on the Protocol tab.
5. Scroll to IPAll, and in TCP Port enter 1433 on the IP Addresses tab. If you do not want to use the default MSSQL server port, you can enter another port number.
7. Click OK.
8. Click SQL Server Services.
9. Right-click SQL Server <COMMVAULT> and select Restart.
Additional Static Port Configuration Steps
If you configured a static port during the port configuration process (
Open TCP/IP Access to the Commvault Database), take the following additional steps.
On the Commvault CommCell Server:
1. Start the ODBC Data Source Administrator tool.
2. Select the Commvault database DSN (usually a system DSN) and click Configure.
3. Click Next.
4. Select With SQL Server authentication using a login ID and password entered by the user.
5. Enter the required User ID and password.
6. Click Client Configuration and make the following changes.
• In the Network libraries window, select TCP/IP.
• Enter the server name.
• De-select Dynamically determine port. ODBC uses port 1433 as a default, so it will be grayed out.
• Click OK.
7. Click Next and change the database, if needed.
8. Click Next, then Finish.
9. Click Test Data Source.
10. Click OK.
Set Up a Read-Only User in the CommServe Server
The Data Collector uses Java Database Connectivity (JDBC) as a read-only user (including executing some read-only functions) to collect point-in-time data from the Commvault Simpana CommServe database. The Data Collector also uses a Commvault Simpana command-line tool (sendLogFiles.exe - executed using WMI on the CommServe server) to collect log files from client machines managed by the CommServe server.
There are two methods to set up an optional read-only user in the CommServe database. Choose one.
Note: MS SQL Server must be set to Mixed-mode authentication and the login to be used for collection must be using SQL authentication.
2. Grant EXECUTE permission for the following stored procedures to the new read-only user:
dbo.GetDateTime
dbo.GetUnixTime
dbo.GetJobFailureReason
dbo.JMGetLocalizedMessageFunc
There are two methods for assigning EXECUTE permission.
Option 1: Execute SQL commands in the CommServe database
GRANT EXECUTE ON CommServ.dbo.GetDateTime TO <ro user>;
GRANT EXECUTE ON CommServ.dbo.GetUnixTime TO <ro user>;
GRANT EXECUTE ON CommServ.dbo.GetJobFailureReason TO <ro user>;
GRANT EXECUTE ON CommServ.dbo.JMGetLocalizedMessageFunc TO <ro user>;
Note: Replace <ro user> with the read-only user.
Option 2: Use MSSQL Management Studio
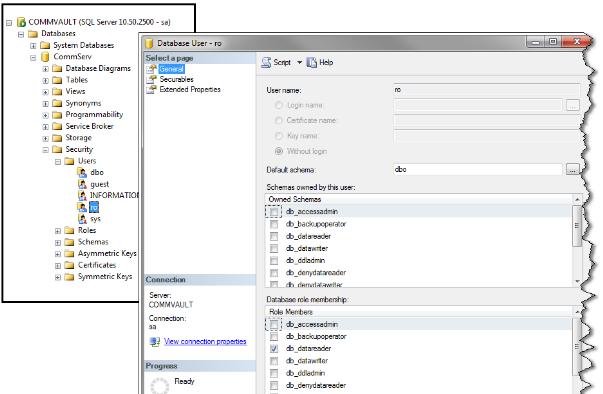
1. Click Databases > CommServe > Security > Users.
2. Select ro in the Users folder and double-click. The Database User screen is displayed.
3. Select the
Securables page.
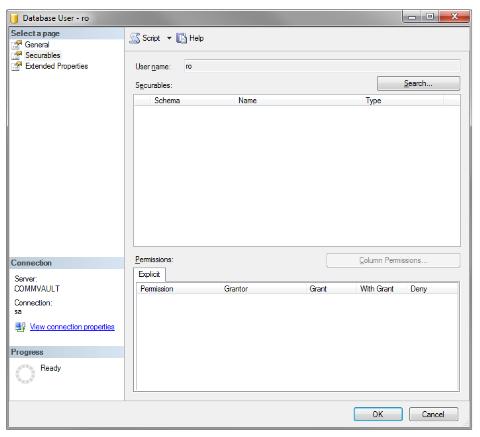
4. Click Search.
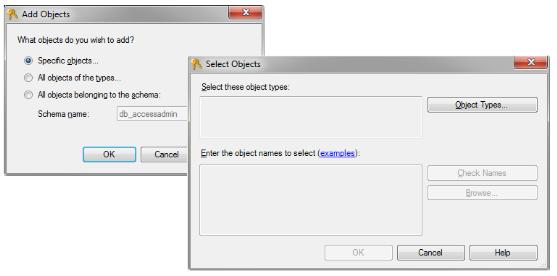
5. Add specific objects.
6. Check Object Type
Scalar functions and
click
OK.
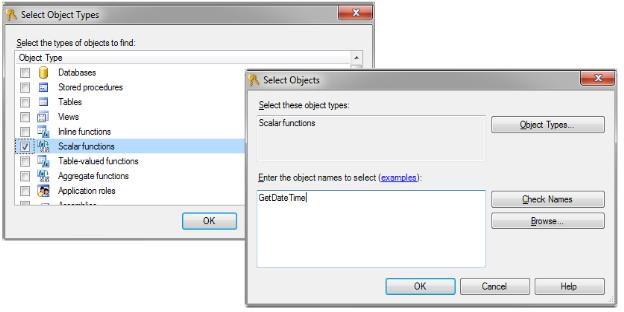
7. Enter the object name
GetDateTime and click
OK.
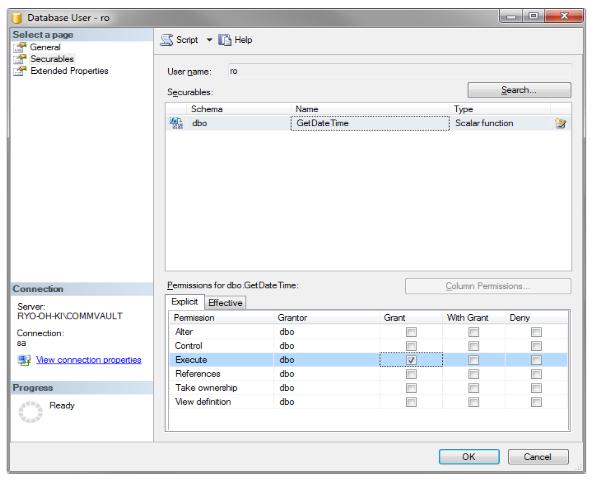
8. Grant execute permissions for GetDateTime by clicking Execute. Click OK.
9. Repeat steps 4-8 for each function:
• GetUnixTime
• GetJobFailureReason
• JMGetLocalizedMessageFunc
Verify Connectivity with the Read-Only User ID
Using SQL Server Management Studio, verify that you can connect and log in to the CommServe SQL database instance using this newly create User ID.
Load Historical Data Prior to Initial Data Collection
This optional procedure is intended to be used only if you want to load the historical data from a CommServe database. This utility must be run prior to the first data collection. It prompts you for the number of hours to go back in time within the historical data and then configures data collection to capture that data.
To configure data collection to capture historical data, follow these steps.
1. At the command line, go to the database tools directory.
cd <HOME>\database\tools
2. Login to SQL Plus.
sqlplus portal/portal
3. Run the utility that configures the Data Collector to look for historical data. This utility only prompts you to enter hours and then configures data collection accordingly.
SQL> @cmv_update_max_lookback_hours.sql
Enter value for hours: 12
old 1: UPDATE ptl_system_parameter SET param_value = &hours WHERE
param_name='
CMV_MAX_LOOK_BACK_HRS'
new 1: UPDATE ptl_system_parameter SET param_value = 12 WHERE
param_name='CMV_
MAX_LOOK_BACK_HRS'
Commit;
1 row updated.
Commit complete.
4. Exit SQL Plus.
SQL> exit
Add Commvault Simpana Servers
For each Commvault Simpana server specified in the APTARE StorageConsole Data Collector Pre-Installation worksheet add the Commvault Simpana servers to StorageConsole.
1. In the Portal, add a host for each CommServe server: Admin > Hosts and Domains > Hosts and Host Groups
• External Name - Displayed in the Portal.
• Internal Name - Must match the host name of the CommServe server.
• IP Address - IP address of the Commserve server.
• Make & Model
• OS
• Type - Commvault Simpana CommServe Server