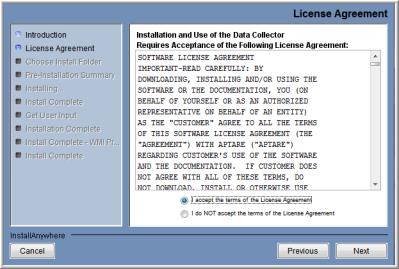
4. Read the agreement.
5. Click on the “I accept the terms of the License Agreement” radio button.
6. Click Next to display the window where you will choose the installation folder.
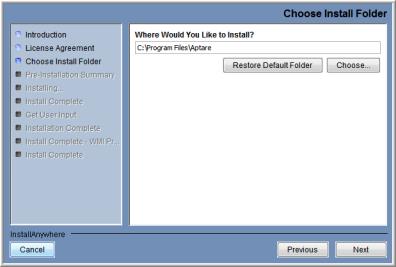
7. Specify the directory where you would like to install the Data Collector software.
• Default for Windows: C:\Program Files\Aptare
• Default for Linux: /opt/aptare
Note: Accepting the default path is recommended.
8. Click Next.
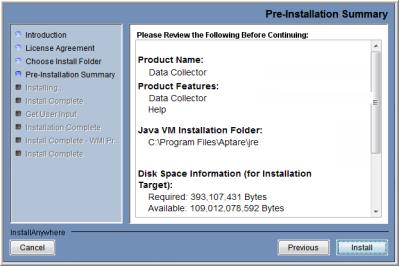
9. Verify the pre-installation summary.
10. Click Install to proceed with the installation.
11. If the installer detects that you do not have Microsoft .NET already installed on the server, it will notify you of this required dependency. Microsoft .NET contains several necessary libraries. Refer to the APTARE IT Analytics Certified Configurations Guide for the required version of .NET.
12. Click OK to enable the installer to proceed with the installation of Microsoft .NET.
The wizard will step you through the process and its progress.
When the WMI Proxy installation completes, the WMIServer will be listed in the Windows Services list with a Startup Type of Automatic, however, this first time you will need to start the service from the Services window. Each time you re-start this Windows server, the proxy services will start automatically.
13. To access the Windows Services list to start the APTARE WMI Proxy Server:
Startup > Control Panel > Administrative Tools > Services
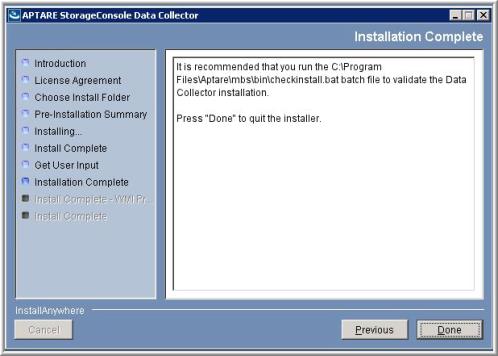
14. The following window will appear when the installation is complete.
15. Click Done to complete the process.
16. It is recommended that you run the C:\Program Files\Aptare\mbs\bin\checkinstall.bat batch file to validate the Data Collector Installation. See
Validating Data Collection.
Testing WMI Connectivity
The Windows Management Instrumentation (WMI) Proxy is used by APTARE IT Analytics to collect data from Windows hosts. Should you have connectivity issues, these steps can be taken to test and troubleshoot connectivity.
To verify that WMI is working properly, take the following steps:
1. Log in to the Data Collector server as an Administrator.
2. From the Windows Start menu, type Run in the search box to launch the following window where you will enter wbemtest.exe and click OK.
3. In the Windows Management Instrumentation Tester window, click Connect.
4. In the Connect window, preface the Namespace entry with the IP address or hostname of the target remote server in the following format:
\\<IP Address>\root\cimv2
5. Complete the following fields in the Connect window and then click Connect.
• User - Enter the credentials for accessing the remote computer. This may require you to enable RPC (the remote procedure call protocol) on the remote computer.
• Password
• Authority: Enter NTLMDOMAIN:<NameOfDomain>
where NameOfDomain is the domain of the user account specified in the User field.
6. Click Enum Classes.
7. In the Superclass Info window, select the Recursive radio button, but do not enter a superclass name. Then, click OK.
8. The WMI Tester will generate a list of classes. If this list does not appear, go to the Microsoft Developer Network web site for troubleshooting help.
http://msdn.microsoft.com/en-us/library/ms735120.aspx