ServiceNow Configuration - Part One
In your ServiceNow application:
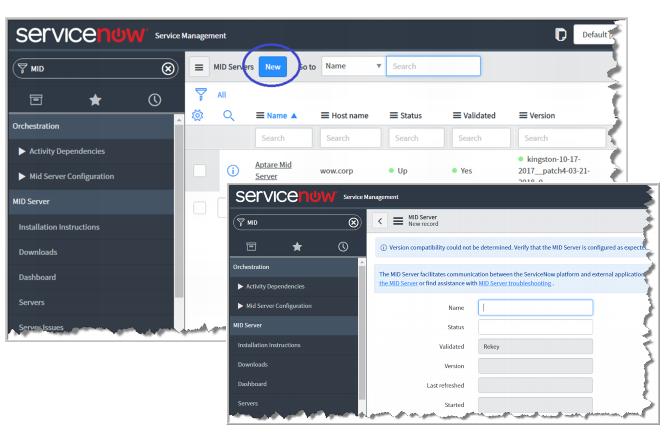
1. Create a new MID Server record. The MID Server facilitates communication between the ServiceNow platform and APTARE Backup Manager. System Administrator role required.
a Use the Filter Navigator to search for MID Server.
b Select MID Server.
c Select Servers under MID Server>Servers.
d Click
New to create a new MID Server record; for example, AptareMID

2. Set a password for the MID Server User. System Administrator role required.
a Using the Filter Navigator, search for System Security.
b Select Users under System Security>Users and Groups>Users.
c Select and set a password for the user
AptareMidServer.

3. Customize the system property BaseURL. This enables navigation to APTARE Backup Manager from inside the ServiceNow application.
a Use the Filter Navigator to search for APTARE Backup Manager.
b Select Configuration Properties.
c Set the value of BaseURL to the URL for your APTARE portal instance. For example:
https://aptareportal.companydomain.com/

4. Set the ServiceNow CMDB CI table name. This enables the integration into the ServiceNow CMDB CI. The field is pre-populated with the default table name.
a Use the Filter Navigator to search for APTARE Backup Manager.
b Select Configuration Properties.
c Enter the name for the ServiceNow CMDB CI table.
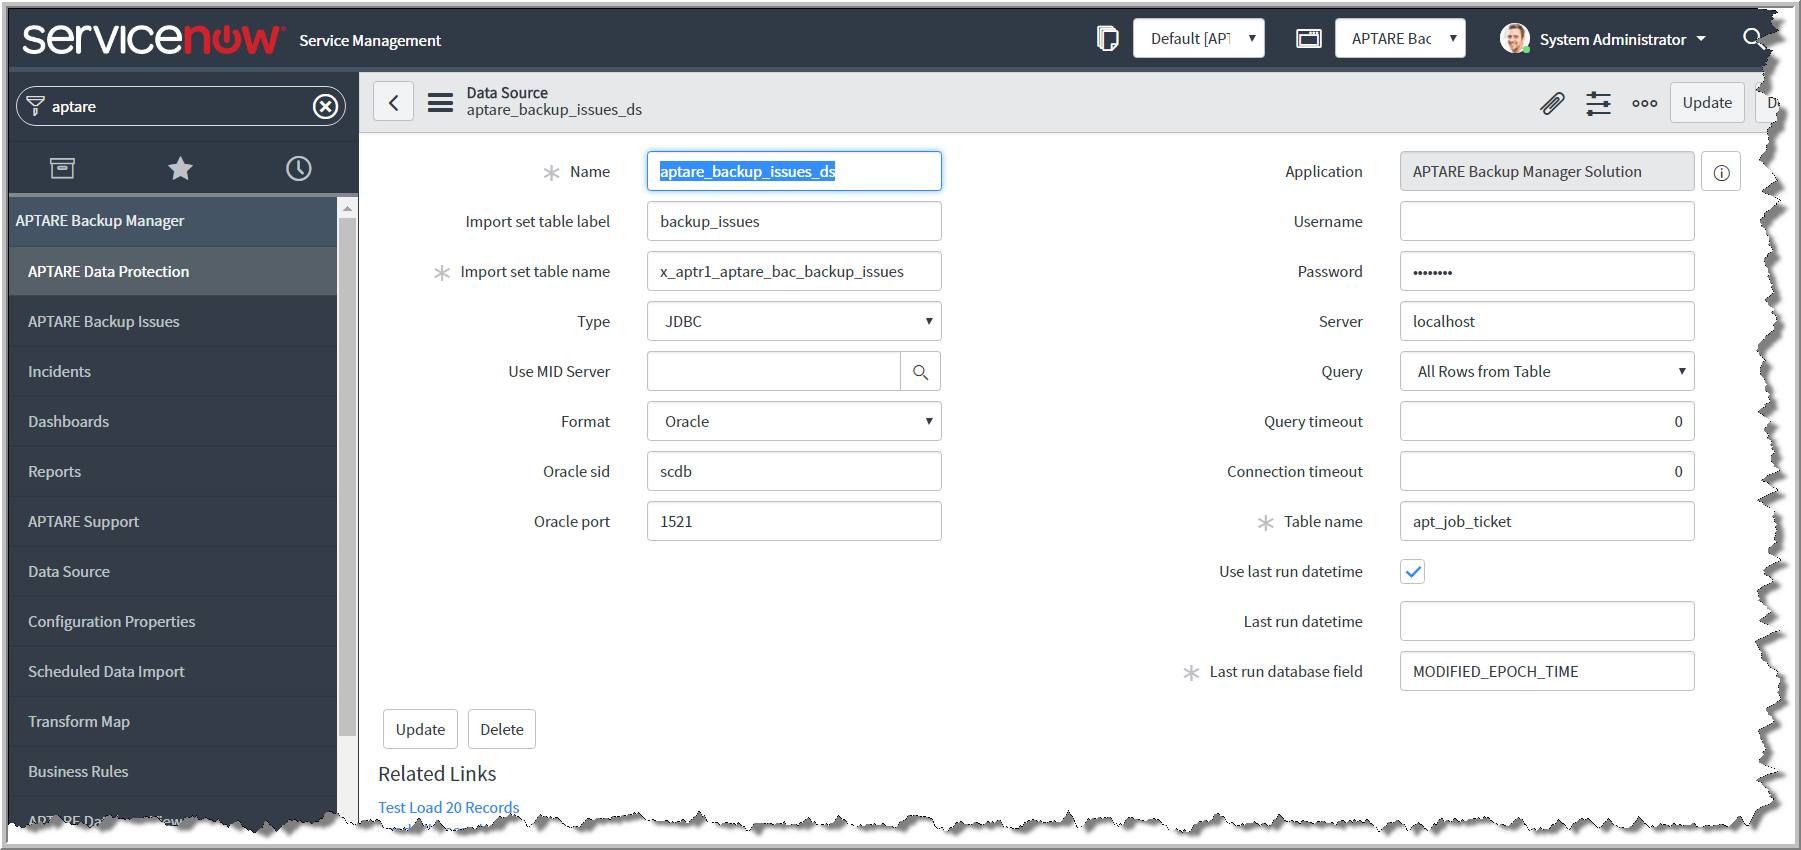
5. Customize the Data Source password for APTARE Backup Issues.
a Use the Filter Navigator to search for APTARE Backup Manager.
b Select Data Source.
c Select aptare_backup_issues_ds and click the link to open the dialog.
d Enter the
Password for the Data Source. This is the same value as the Oracle user password, as supplied by the APTARE Administrator.

6. Customize the Data Source password for APTARE Data Protection.
a Use the Filter Navigator to search for APTARE Backup Manager.
b Select Data Source.
c Select aptare_data_protection_ds and click the link to open the dialog.
d Enter a username. This is your Oracle user name.
e Enter the
Password for the Data Source. This is the same value as the Oracle user password, as supplied by the APTARE Administrator.

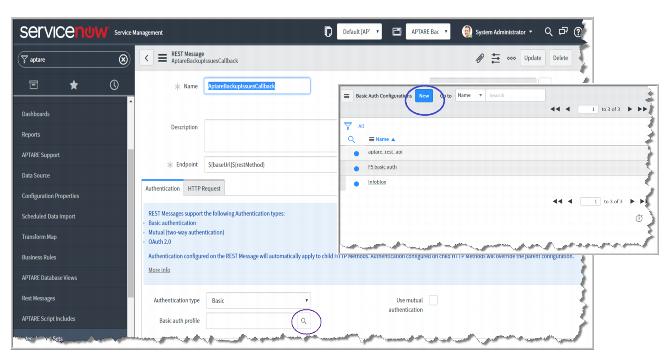
7. Set the REST API callback userid /password. System Administrator role required.
a Use the Filter Navigator to search for REST Messages.
b Select AptareBackupIssuesCallback and open the window.
c Click the Lookup using list icon for the field Basic auth profile. A new window is displayed.
d Click New. A secondary window is displayed.


