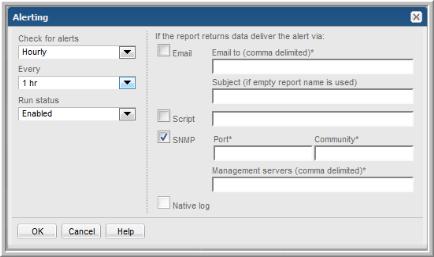
Check for alerts/Schedule | To schedule a report to be checked for alerts on a regular basis, you must select one of the following options from the drop-down list: • On a defined schedule - Master schedules can be configured and then applied to reports. Modifications to a master schedule will automatically be applied to all the reports associated with that master schedule. See Configuring Master Schedules. • Hourly - Select 1, 2, 3, 4, 6, or 12 hours. • Daily - At: hour/minute. Select a specific time. • Weekly - • On every. Check the day(s) on which the report will be checked. • At: hour/minute. Select a specific time. • Monthly - • On the. Select the day on which the report will be checked. • At: hour/minute. Select a specific time. The Portal can check the same report multiple times in a single day. |
Run Status | Select Enabled or Disabled. This selection enables or disables the schedule for the report to be checked for alerts. |
Email | Check the box and provide a comma-separated list of email addresses. |
Subject | Enter the subject. The report name is used if the field is left blank. |
Script | The user-created script needs to reside in: /opt/aptare/portal/user_scripts Check the box and enter a shell script name (Linux). If a path name is included, it will be appended to the above path. For example, filter a report to include only the columns of information that you need. When the alert is triggered, a .csv file of the report is generated and the path to that file is made available to the script to take whatever actions you want with this report data. |
SNMP | When you check this box, the Port, Community string, and Management servers fields will be populated from the configured defaults. To override the defaults, overwrite any or all of the three SNMP fields. Administrators: To enable SNMP delivery and to configure SNMP default values, see Adding/Configuring a Domain. |
Native Log | When this box is checked, a log entry is written to the OS-specific log: either the Windows event log or the Linux syslog. |