Installing a License on a Microsoft Windows Portal Platform
Use the procedures listed in this section to install the Portal license. If you are replacing a license key with a new one, refer to
Removing a Portal License.
1. Receive the License File
• The best practice is to delete all prior Portal license key files from the system before you install the new license key, as this new license key replaces all other license keys.
• Save the new license file on your Portal server and then complete all of the following steps.
2. Ensure that the Oracle Processes are Running
• C:\opt\aptare\utils\startoracle.bat
3. Run the Installation Script and Restart Services
1. Open a DOS command prompt window by entering:
Start > Run > cmd
2. Run the license installer utility: C:\opt\aptare\utils\installLicense.bat
3. When prompted for the name of the license file, enter the complete path to the license key file you saved on your server. Overwrite an existing license if you are prompted to do so. A sample dialog is shown below:
Enter the name of the license file you wish to install [portal.license] : C:\opt\aptare\mycompany.license
Verifying license...
Copying license...
License installed
SystemConfig. File Name is c:\opt\aptare\portalconf\portal.properties
DbPool.initilised().Entering. 25 2
GenericPool.setMaxObjectCount(). Entering 0 0 25 GenericPool.initializePool(). Entering 0 25
New JDBC connection pool established
DbHandle.init(). Initialized the DbPool.
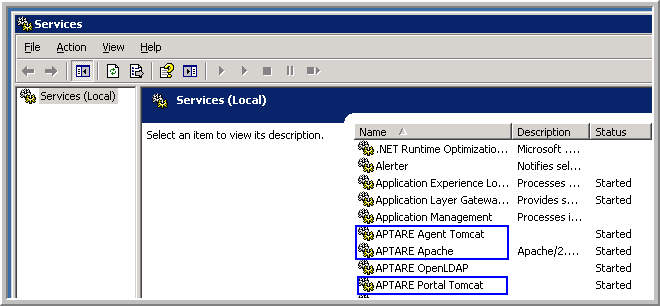
4. Start or restart the following services via the Windows Services Control Panel to complete the installation:
• APTARE Apache
• APTARE Portal Tomcat
• APTARE Agent Tomcat
5. Verify that the services are running by viewing the Services panel:
4. Verify the License Installation

